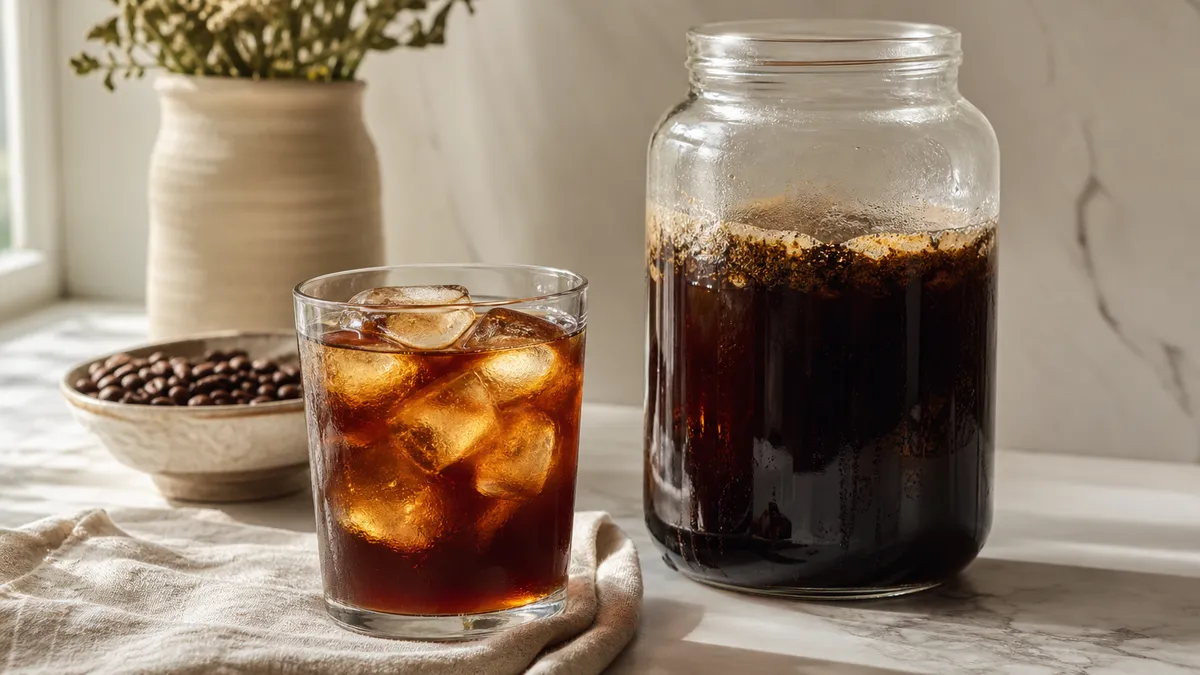
Make cold brew by steeping ground coffee in cold water in the fridge, then filtering out the grounds. Start with 100 g coffee and 400 g water for concentrate, or 50 g coffee and 600 g water for ready-to-drink coffee, and allow 20 to 24 hours for the refrigerator method below.
In short
- Brew ratios describe dry coffee to added water by weight: 1:4 for this concentrate and 1:12 for the ready-to-drink version.
- Start with a coarse grind, with visible particles rather than powder.
- Use chilled drinking water and keep the covered brew at 0 to 5°C throughout steeping and storage.
- Dilute filtered concentrate separately: start with one part concentrate to two parts water or milk.
- For this home method, use or freeze the coffee within 48 hours of starting the brew. This is a conservative editorial recommendation, not a validated cold-brew shelf life.
What you need to make cold brew
Cold brew is an immersion method: the grounds remain submerged while water extracts soluble coffee compounds. It does not need a dedicated brewer. A clean food-safe jar with a lid, kitchen scales, a sieve and a paper coffee filter are enough.
Choose a vessel with room for the water and grounds, plus space to stir without spilling. You will also need a second clean container for filtering and storage.
A cafetière can hold the steeping mixture and separate the larger particles afterwards. Its mesh will not remove every fine particle, so follow with paper filtration if you prefer a clearer drink. See French press brewing for the equipment’s usual hot-water method.
Use fresh drinking water, preferably already chilled. If your tap water has an obvious chlorine smell, try water passed through a properly maintained drinking-water filter. You do not need to buy special water to begin.
For the wider choice of equipment and approaches, see brewing methods.
Cold Brew Concentrate
Concentrate is coffee brewed strong enough to dilute before serving. It is useful when you want to make both black and milk drinks from the same batch.
The following are starting recipes, not universal standards. Manufacturers use different combinations of grind, strength and steeping time, so avoid borrowing one setting from a different recipe without considering the others.
| Preparation | Coffee | Added water | How to serve |
|---|---|---|---|
| Concentrate, 1:4 | 100 g | 400 g, approximately 400 ml | Start with one part filtered concentrate to two parts water or milk |
| Ready-to-drink, 1:12 | 50 g | 600 g, approximately 600 ml | Taste before adding water; allow for melting ice |
Weigh the brewing water wherever possible. The millilitre equivalents are practical kitchen approximations.
The amount you collect will be less than the water added because the grounds retain liquid. Do not top up the filtered concentrate to the original water quantity: that would dilute it before you have chosen the serving strength.
Grind and coffee choice
Start coarse, similar to the grind commonly used for a cafetière. Avoid powdery espresso grounds, which are harder to separate cleanly and can make filtering frustrating.
Coarse is a practical starting point, not a scientific requirement. Controlled extraction research found that smaller particles and warmer brewing temperatures increased extraction rate and yield. A finer grind can therefore work, but it changes the timing and filtration requirements.
For a first batch, choose a coffee whose flavour description already appeals to you. My preference for milk drinks is a medium roast with chocolate or nut notes; for black coffee, I would also try a fruitier coffee rather than assuming cold brew must taste dark and heavy.
Refrigerator temperature and steeping time
For this jar method, steep for 20 to 24 hours at 0 to 5°C. Check the fridge with a thermometer rather than relying on its numbered control dial.
There is no single correct time for every cold brewer. OXO specifies 20 to 24 hours in the fridge for its compact concentrate brewer, while Hario specifies approximately eight hours for its Mizudashi recipe using a finer grind. Those instructions belong to different recipes and equipment.
This guide deliberately uses refrigerator preparation throughout. Although some manufacturer recipes allow room-temperature steeping, the colder approach provides a more cautious default for an unvalidated homemade batch.
How to make cold brew, step by step
Ingredients: 100 g coarsely ground coffee and 400 g chilled drinking water, approximately 400 ml.
Equipment: lidded food-safe jar, scales, spoon, sieve, paper coffee filter and supporting holder, and a clean storage container.
Timing: 20 to 24 hours refrigerated steeping, plus filtering.
-
Clean everything first. Wash your hands and clean the jar, lid, spoon, sieve and storage container thoroughly with warm soapy water. Rinse off detergent. Follow the manufacturer’s cleaning instructions for reusable filters and any specialist brewer.
-
Weigh the ingredients. Put 100 g coffee into the jar and add 400 g chilled water. For ready-to-drink coffee instead, use 50 g coffee and 600 g water.
-
Wet all the grounds. Stir gently until there are no obvious dry pockets. Scrape floating dry grounds into the water with the clean spoon. There is no need to shake the jar repeatedly.
-
Cover and refrigerate immediately. Keep at 0 to 5°C for 20 to 24 hours. Mark the starting date and time so storage does not become guesswork.
-
Separate the grounds. Pour through a clean sieve into a clean jug. If using a cafetière, lower the plunger gently and decant rather than leaving the finished coffee on the grounds.
-
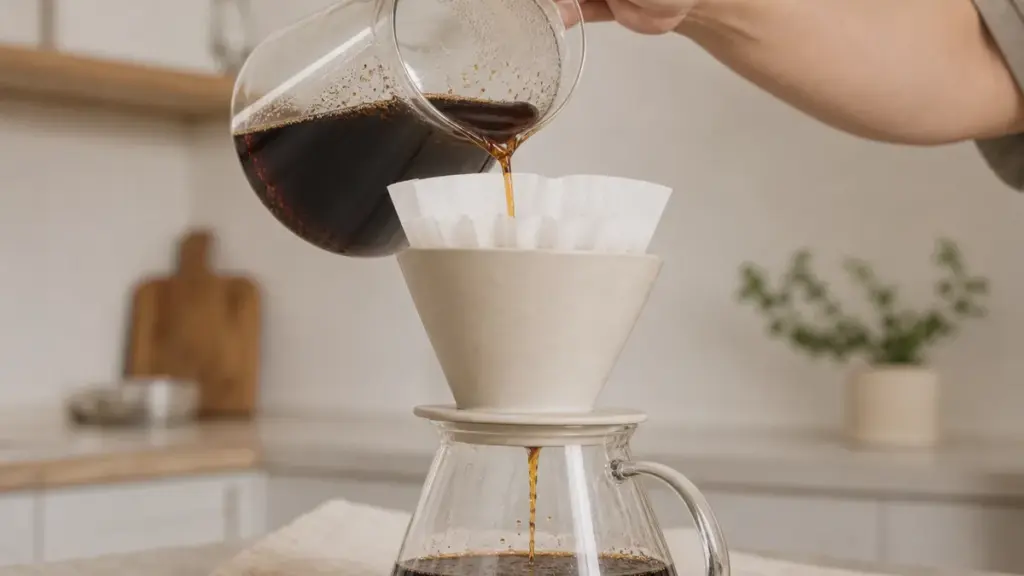
Filter for clarity. Pass the strained coffee through a paper coffee filter supported in a suitable holder. Let gravity do the work. If it stalls, replace the clogged paper rather than squeezing it or forcing grounds through.
-
Cover, chill and dilute a serving. Return the filtered coffee promptly to the fridge. For concentrate, try 50 ml coffee with 100 ml cold water or milk. Taste before adding ice, then adjust the next serving.
Filtering removes grounds; it does not pasteurise the drink or make it suitable for room-temperature storage. Keep handling time outside the fridge as short as practical.
Homemade Concentrate Recipes
These are suggested serving combinations for the 1:4 concentrate above, not laboratory-tested formulations. Each makes one drink and uses already filtered, refrigerated coffee.
Simple iced black coffee
Mix 50 ml concentrate with 100 ml cold drinking water, then pour over 60 g ice. Stir and taste.
For a stronger-tasting drink, reduce the added water next time rather than automatically increasing the concentrate portion. Melting ice adds further dilution, so judge the drink both immediately and after it has stood briefly.
Cold brew with milk
Mix 50 ml concentrate with 100 ml cold pasteurised milk or a plant-based alternative, then add 60 g ice. Stir until evenly combined.
Keep milk out of the stored concentrate and add it only when serving. Follow the milk or alternative’s storage instructions and use-by guidance.
Lightly sweetened vanilla cold brew
Dissolve 5 g caster sugar in 100 ml drinking water, stirring until no crystals remain. Add 50 ml concentrate, 1 ml vanilla extract and 60 g ice, then stir again.
Adjust the sugar in your next serving rather than sweetening the whole storage bottle. This leaves the remaining concentrate suitable for either black or milk drinks.
Dilution is separate from brew ratio
The brewing ratio compares dry coffee with added brewing water by weight. The serving dilution compares filtered liquid concentrate with the liquid you add afterwards.
For example, 50 ml concentrate plus 100 ml water makes 150 ml before ice: a one-to-two dilution by volume. It does not turn the original 1:4 brewing recipe into an exact 1:12 brew, because some water and dissolved coffee remain in the discarded grounds.
Nor does adding water remove caffeine. If you drink the whole diluted serving, you consume the caffeine present in the concentrate portion.
Storage and food safety
Treat homemade cold brew as a refrigerated, perishable drink. There is no hot brewing stage in this method, and putting coffee in a covered bottle does not make it sterile.
For this guide, use or freeze the coffee within 48 hours of first mixing the grounds and water. After a 24-hour steep, that leaves approximately another 24 hours for filtering and drinking.
This deliberately cautious recommendation draws on the Food Standards Agency’s general two-day leftovers guidance. That guidance is not a cold-brew-specific shelf-life validation, and 48 hours is not a guarantee of safety if preparation or refrigeration has been poor.
Manufacturer advice varies considerably. Hario recommends using its refrigerated brew within two to three days, whereas Toddy describes refrigerated concentrate as staying fresh for up to two weeks. Those differing product instructions should not be treated as interchangeable proof that any homemade jar will remain safe for the longer period.
Follow these handling rules:
- Keep the covered brew and finished coffee at 0 to 5°C.
- Use a clean container for each batch rather than topping up old coffee.
- Pour servings out; do not drink directly from the storage bottle.
- Add milk, flavourings and ice to individual servings.
- Discard coffee with visible mould or unexpected fermentation. Do not taste a suspect batch to decide whether it is safe.
Commercially validated shelf-stable cold brew is a different product from this homemade method. Follow its label, including refrigeration and use instructions after opening. Do not attempt to make a home batch shelf-stable through ordinary bottling, vacuum sealing or adding nitrogen.
Troubleshooting cold brew
Change one variable at a time and keep a note of the coffee, grind, ratio and steeping time. Otherwise, a better second batch may be difficult to reproduce.
| Symptom | Likely cause | Fix |
|---|---|---|
| Too strong after serving | Too little dilution | Add water or milk gradually and record the preferred proportions |
| Thin or weak | Excessive dilution, dry pockets or insufficient extraction | Reduce dilution first; wet grounds thoroughly and use the full recipe steep |
| Harsh or drying | Coffee choice, excessive strength or too much extraction for that grind | Dilute a small sample; if still unpleasant, try a coarser grind or shorter steep next time |
| Gritty or muddy | Fine particles passing through mesh | Follow coarse straining with paper filtration |
| Paper filter barely drains | Too much sediment reaching the paper | Sieve first, pour gently and replace clogged paper |
A weak drink is not always an under-extracted brew. Strength describes how concentrated the drink is; extraction describes how much soluble material has moved out of the grounds. Adding too much water can make a well-extracted coffee taste thin, while an insufficiently extracted concentrate can still taste forcefully strong.
That distinction is particularly useful with cold brew: adjust the serving dilution before redesigning the whole brewing recipe.
FAQ
Can I make cold brew with ordinary pre-ground coffee?
Yes, but you may need to adapt filtration and timing. A finer pre-ground coffee can extract faster than the coarse grind used here and can leave more sediment or clog paper. Start with a small refrigerated batch, strain before paper filtering, and shorten the next steep if the flavour is harsh or drying.
Can I serve cold brew hot?
Yes. Add hot drinking water to a portion of concentrate instead of cold water, adjusting the dilution to taste. Heating a serving does not change how the original coffee was extracted. It also should not be used to rescue coffee that has been stored incorrectly or kept beyond the recommendation in this guide.
How much caffeine is in homemade cold brew?
There is no dependable fixed figure for this recipe without analysis of the finished drink. Coffee choice, dose, extraction and concentrate portion all matter, and dilution does not remove caffeine. The NHS advises no more than 200 mg daily from all sources during pregnancy. If caffeine needs close monitoring, seek advice from a GP, pharmacist or midwife.
Where to go next
Read Cold Brew vs. Iced Coffee to choose between slow cold extraction and coffee brewed hot for serving cold. For alternatives when you do not want to wait overnight for cold brew, AeroPress explains a compact brewing method, while Moka Pot Brewing covers concentrated stovetop coffee.
Sources
-
OXO, “How to Use the OXO Compact Cold Brew Coffee Maker” (2022). Manufacturer instructions supporting coarse grinding, refrigerator steeping for 20 to 24 hours, filtration and dilution. The jar recipe here is an editorial adaptation, not an OXO equipment instruction.
https://www.oxo.com/blog/coffee-and-beverages/how-to-make-cold-brew-coffee -
Toddy, “Toddy Cold Brew System Brewing Guide” (2022). Manufacturer instructions supporting coarse-ground concentrate preparation, thorough wetting and a starting dilution of one part concentrate to two parts water or milk; also consulted for its stated refrigerated freshness period.
https://toddycafe.com/cold-brew/instruction-manual -
Hario, “Hario ‘Mizudashi’ Coffee Pot”, instruction manual MCPN_14_8 (undated). Manufacturer instructions covering finer grinding, approximately eight hours’ refrigerator extraction, liquid retained by grounds, removal of the strainer and refrigerated use within two to three days.
https://global.hario.com/manual_pdf/MCPN_14_8.pdf -
Wang, X. and Lim, L.-T., “Effects of grind size, temperature, and brewing ratio on immersion cold brewed and French press hot brewed coffees”, Applied Food Research, volume 3, issue 2, article 100334 (2023). Controlled laboratory extraction research supporting the effects of grind and temperature and the distinction between beverage concentration and extraction yield.
https://doi.org/10.1016/j.afres.2023.100334 -
Food Standards Agency, “How to chill, freeze and defrost food safely” (2017, current retrieved guidance). Supports refrigeration at 0 to 5°C, minimal time outside refrigeration and general two-day leftovers guidance. It does not establish a validated shelf life for homemade cold brew.
https://www.gov.uk/government/publications/how-to-chill-freeze-and-defrost-food-safely/how-to-chill-freeze-and-defrost-food-safely -
Food Standards Agency, “Why is cleaning important” (2017, current retrieved guidance). Supports hand washing, clean utensils and containers, warm soapy cleaning and following cleaning-product instructions.
https://www.gov.uk/government/publications/why-is-cleaning-important/why-is-cleaning-important -
Wisconsin Department of Agriculture, Trade and Consumer Protection, “Cold Brew Coffee”, fact sheet P-DFRS0203 (December 2023). Cold-brew-specific authority guidance supporting refrigeration, sanitation and caution about extended storage and reduced-oxygen packaging. Consulted for safety principles, not presented as UK law or domestic shelf-life guidance.
https://datcp.wi.gov/Documents2/ColdBrewFactSheet.pdf -
NHS, “Foods to avoid in pregnancy”, caffeine section (undated current webpage). Supports the pregnancy limit of 200 mg caffeine daily from all sources.
https://www.nhs.uk/pregnancy/keeping-well/foods-to-avoid/ -
European Food Safety Authority, “Caffeine” (current webpage summarising its 2015 scientific opinion). Supports caffeine’s presence in coffee and the need to consider intake from all dietary sources; consulted alongside extraction research when avoiding an unsupported homemade caffeine estimate.
https://www.efsa.europa.eu/en/topics/topic/caffeine
This piece was researched using manufacturer brewing instructions, controlled extraction research and official food-safety and caffeine guidance; the serving combinations are editorial suggestions, with no claim of first-hand testing.
Last checked: November 2026