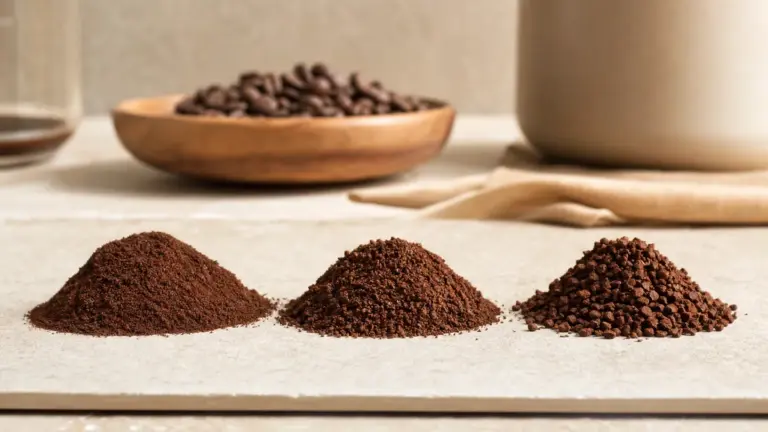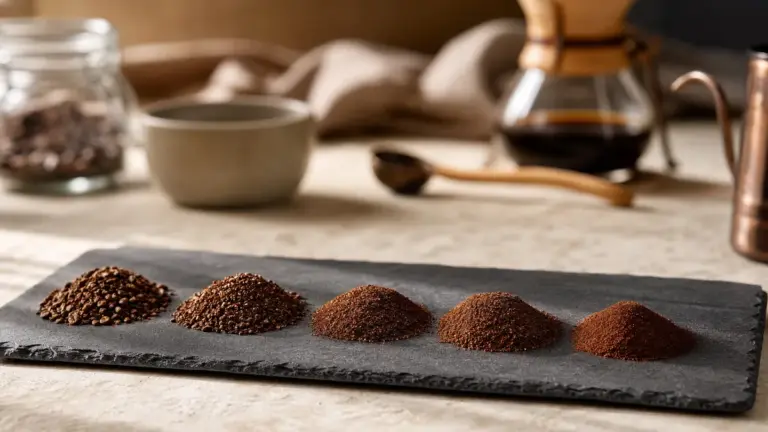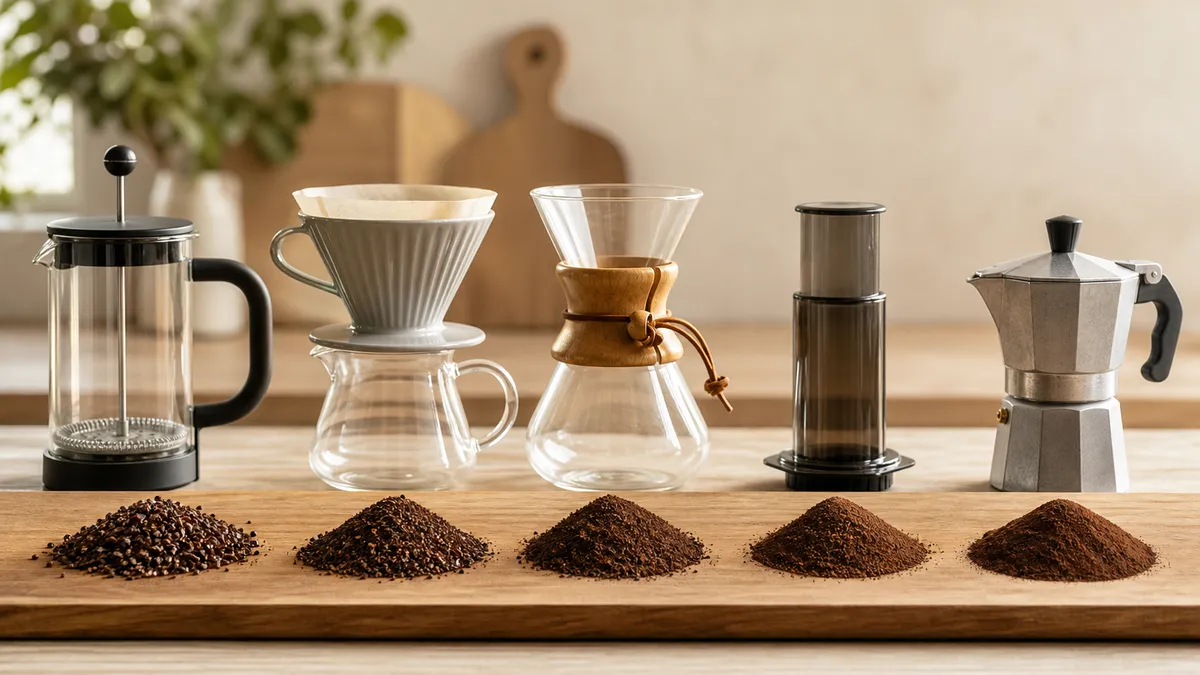
Use a coarse grind for cafetière and immersion cold brew, a medium grind for most filter machines, medium-fine for a starting pour-over recipe, fine for espresso and powder-fine for Turkish coffee. This coffee grind size chart gives you visual starting points, not fixed rules: choose the texture for your brewer, then adjust using taste and flow.
In short
- Compare loose grounds spread thinly on a pale plate, rather than judging a compressed heap.
- Everyday comparisons such as sand, sugar and salt are illustrations, not measured particle-size standards.
- Use the starting setting published for your exact grinder model. Numbers and clicks do not transfer reliably between grinders.
- Keep the coffee dose, water quantity and brewing technique unchanged while testing a grind adjustment.
- Slow flow and difficult pressing are reasons to investigate an overly fine grind, not reasons to force water through.
Coffee grind size chart by brewing method
Find your brewing method below and begin with the suggested texture. Where the brewer or recipe specifies something different, follow that guidance first.
The comparisons describe appearance and feel, not exact dimensions. Salt and sugar themselves vary in size, so pay attention to the accompanying description.
| Brewing method | Starting grind | Everyday visual comparison | What to watch |
|---|---|---|---|
| Turkish coffee, brewed in a cezve | Extra-fine | Icing sugar: powder rather than obvious grains | Use coffee ground specifically for this method |
| Espresso | Fine | Fine table salt, with very small grains still discernible | Adjust against a fixed dose and beverage yield |
| Moka pot | Medium-fine, coarser than espresso | Fine sand: gritty rather than floury | Follow the pot’s instructions; do not tamp |
| AeroPress | Medium-fine for the manufacturer’s usual starting approach | Fine sand with visible grains | Press gently; excessive resistance needs investigation |
| V60 and similar cone pour-overs | Medium-fine as an initial reference | Fine sand, not powder | Watch drainage and taste before changing settings |
| Automatic filter machine | Medium | Ordinary sand, with clearly visible particles | Check the machine’s own recommendation |
| Chemex | Medium-coarse | Coarse sand approaching small salt crystals | The manufacturer recommends medium-coarse for extraction and flow |
| Cafetière, also called French press | Coarse | Coarse sea salt: distinct, irregular fragments | Avoid a predominantly powdery sample |
| Immersion cold brew | Coarse | Coarse sea salt, similar to a cafetière grind | Follow the brewer’s filtration requirements |
Read down the chart as a broad progression towards larger particles, not a set of separate compartments. Moka, AeroPress and pour-over recommendations overlap because the recipe matters as well as the brewer.
For the wider subject, use the grind size and extraction hub. This chart is the quick reference; the linked guides explain what happens after the grounds meet water.
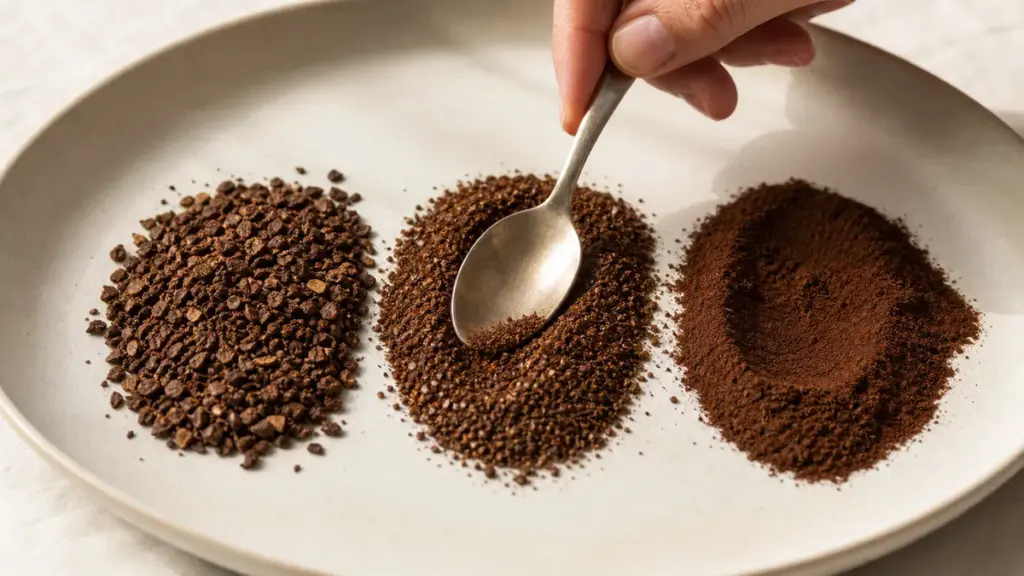
How to recognise the textures
Powder-fine and fine
Turkish coffee should look like powder. Spread a little on a plate and you should see a soft-looking layer rather than a collection of clearly separate granules.
Espresso grounds are fine too, but the useful comparison is a finely granular material rather than a flour substitute. A photograph can help distinguish espresso from cafetière grounds, but it cannot tell you whether a particular espresso setting will work in your basket.
Medium-fine and medium
At medium-fine, the grounds should look granular when spread out. Think of fine sand rather than dust: this is a useful starting reference for the V60 and AeroPress approaches shown above.
Medium grounds look more obviously grainy, with larger individual fragments. The distinction between medium and medium-fine is less dramatic than the difference between espresso and cafetière, which is why brewing feedback becomes more useful than appearance alone.
Medium-coarse and coarse
Medium-coarse grounds resemble rough sand or small salt crystals. Coarse grounds have more substantial, individually recognisable fragments, rather like coarse sea salt.
There will still be smaller particles among them. A grinder produces a particle-size distribution, meaning a mixture of sizes, rather than identical miniature pieces of coffee.
Make a useful visual comparison
Place loose samples on matching pale saucers, spread them to a similar depth and view them from the same distance. Arrange them from powder-fine to coarse, keeping a little space between samples.
Use this as a relative comparison within your own setup. Do not try to match a phone photograph grain for grain: magnification changes how large everything looks, and a heap hides the smaller particles. The complete grind size guide explains why the mixture of particle sizes matters beyond the overall appearance.
Why grinder settings are not universal
A setting is a position on a particular grinder’s adjustment system, not a standard unit of grind size. “Medium” on one dial and a numbered setting on another are not interchangeable measurements.
Even grinders of the same make and model can differ slightly in calibration, the relationship between their adjustment markings and actual grinding position. The coffee also matters: Baratza identifies roast level, freshness and bean characteristics among the reasons a published starting setting may need adjustment.
For a concrete example, Baratza’s Vario+ manual gives 2Q for espresso, 6M for Hario V60 and 10M for French press as general starting points. These are manufacturer recommendations for that model, not settings to copy onto a different grinder.
Use this order of priority:
- Your grinder’s manual: find the recommendation for the exact model.
- Your brewer or recipe: check whether it asks for a particular grind or brewing behaviour.
- The texture chart: use it to catch an obviously unsuitable starting point.
- The brewed result: refine the setting in small increments.
Record whether your grinder’s numbers increase towards finer or coarser. For click-adjusted hand grinders, also record the reference point specified by the manufacturer, rather than assuming every recipe counts clicks in the same way.
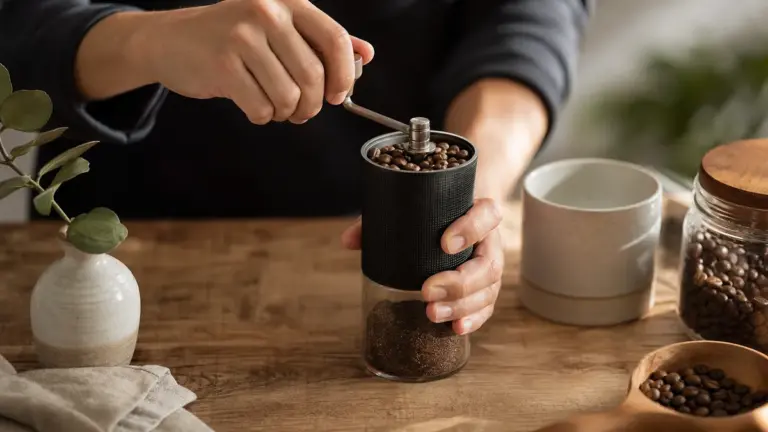
Follow the manual when moving the adjustment mechanism, especially towards a finer setting with beans inside. The practical handling belongs in how to grind coffee; there is no single adjustment procedure that should replace your machine’s instructions.
How to adjust grind size without chasing your tail
Change the grind while keeping the recipe steady. Changing the dose, temperature and pouring pattern at the same time makes the result much harder to interpret.
The following is a grind-comparison exercise, using Hario UK’s Expert V60 Brew Guide as the baseline, rather than a claim that every V60 should use the same recipe.
- Set the baseline. Use 15 g of medium-fine coffee and 250 g of brewing water, approximately 250 ml measured before heating. This is a coffee-to-water ratio of about 1:16.7 by weight.
- Keep temperature consistent. Hario specifies water at 92 to 96°C. Choose a point within that range and keep it unchanged between comparison brews.
- Repeat the preparation. Rinse the paper, discard the rinse water and add the grounds. Wet all the coffee, wait about 30 seconds, then continue pouring gently in circles to the total water weight.
- Record the result. Hario gives around 2 minutes 30 seconds for its process. Record your actual time and taste, treating that timing as a recipe reference rather than a pass-or-fail rule.
- Make one small adjustment. If drainage is excessively slow, try slightly coarser. If the brew is weak and drains readily, test slightly finer.
- Repeat before changing another variable. Keep the same coffee, dose, water quantity, filter and pouring approach, then compare the cups.
For espresso, use beverage weight, not cup volume, when making the comparison. Keep the dose and target yield fixed while adjusting grind, so a change in shot size does not confuse the result.
A useful notebook entry is simply: coffee, brewer, setting, dose, water or espresso yield, temperature, time and a few taste words. “Thin and sharply sour” tells you more than “not right”.
Troubleshooting: taste and flow together
Use the table to choose a first test, not to diagnose every disappointing coffee from one flavour.
| Symptom | Likely cause to investigate | First adjustment or check |
|---|---|---|
| Espresso tastes sour and thin and runs unusually quickly | Grind too coarse for the fixed recipe | Try slightly finer while keeping dose and yield unchanged |
| Espresso tastes harsh and bitter and runs unusually slowly | Grind too fine for the fixed recipe | Try slightly coarser |
| Pour-over drainage becomes excessively slow | Grind too fine or too many small particles restricting flow | Test slightly coarser while keeping pouring consistent |
| AeroPress becomes difficult to press | Fine particles restricting the route through the coffee | Stop forcing it; check grind and follow the manufacturer’s troubleshooting |
| Results barely change after moving the dial | Grounds retained from the previous setting may be mixing into the next dose | Follow the grinder maker’s guidance on clearing retained grounds |
Do not force an AeroPress plunger or tamp a moka basket to compensate for the wrong grind. Those are not substitutes for adjusting the coffee appropriately.
For the underlying brewing mechanisms, read the impact on brewing.
What a grind chart cannot tell you
Finer does not always mean better extraction
Grinding finer increases the available surface area, but water still has to move through the coffee. In a flowing brew, a change that helps extraction at the particle surface can also restrict the movement of water through the bed.
A peer-reviewed espresso study by Cameron and colleagues combined mathematical modelling with brewing experiments. It found lower extraction yields at both very coarse and very fine settings, rather than extraction increasing indefinitely as the grind became finer.
The practical lesson is modest: if repeatedly grinding finer makes an espresso less consistent, do not assume another finer adjustment must solve it. That study concerns espresso conditions, not a universal instruction to grind every brewing method coarsely.
One average size does not describe the whole sample
Two samples can share a broadly similar appearance while containing different proportions of small particles. Those small particles are often called fines.
The SCA’s home-grinder standard assesses grind quality using a particle-size distribution. Its test requirements should not be mistaken for a universal chart assigning one exact particle diameter to every brewing method.
That is why this guide avoids unsupported micron boundaries between “medium” and “medium-fine”. Texture gets you into a useful starting area; a controlled brew tells you where to go next.
Time is feedback, not the sole target
Keep time in your notes, but judge it alongside taste and flow. A recipe’s timing describes that recipe, not every dose, filter and pouring approach used with the same brewer.
Use extraction time and grind size when you need to understand that relationship in more detail. Keep this coffee grind size chart beside the grinder as a starting reference, then save the settings that work for your own coffee and equipment.
FAQ
Can I use supermarket ground coffee if I do not own a grinder?
Yes, provided the grind is intended for your brewing method. Check the pack for a brewing recommendation rather than assuming all ground coffee is interchangeable. If buying from a roaster, ask for the named method, such as cafetière, filter or moka. You will have less scope to adjust, so begin with the brewer’s instructions.
Does “espresso roast” mean the coffee is ground for espresso?
No, the roast description does not establish the grind size. Check separately whether the product contains whole beans or ground coffee, and which brewing method the ground version is intended for. When asking someone to grind a bag, name your brewer rather than relying on a roast label.
Can a blade grinder follow this chart?
It can produce grounds with a broadly similar appearance, but repeating a precise setting is harder. A blade grinder chops coffee rather than controlling particle size through an adjustable burr gap. Use the chart as a rough visual check, but do not expect a grinding duration to translate reliably into a particular burr-grinder setting.
Where to go next
Read Coffee Grind Size and Consistency: The Complete Guide for the fuller explanation of particle sizes, or How to Grind Coffee for the practical workflow. Extraction Time and Grind Size is the next useful read when the texture looks plausible but the brew timing still puzzles you.
Sources
-
KitchenAid, Coffee Grind Size and Settings Guide, undated, retrieved November 2026. Manufacturer guidance on brewing-method starting points, texture comparisons, filters and adjustment.
https://www.kitchenaid.com/countertop-appliances/pinch-of-help/coffee-grind-size -
Hario UK, Expert V60 Brew Guide, undated, retrieved November 2026. Manufacturer baseline for medium-fine grinding, dose, water, temperature, timing and adjustment.
https://www.hario.co.uk/pages/brew-guides-v60-expert -
Chemex, FAQ, undated, retrieved November 2026. Manufacturer recommendation for medium-coarse grinding.
https://chemexcoffeemaker.com/pages/faq -
AeroPress, FAQs for the AeroPress Coffee Maker, undated, retrieved November 2026. Manufacturer guidance on medium-fine grinding, burr grinders and restricted pressing.
https://aeropress.com/pages/faq -
Toddy, Cold Brew System Brewing Guide, 2022. Manufacturer instructions specifying coarse-ground coffee.
https://toddycafe.com/downloads/toddy_retail_instructions.pdf -
UNESCO, Turkish Coffee Culture and Tradition, 2013 inscription record. Description of grinding coffee to a fine powder.
https://ich.unesco.org/en/RL/-00645 -
Ratio, Suggested Grind Size for Some of Our Favorite Grinders, undated, retrieved November 2026. Manufacturer guidance on calibration differences and starting settings.
https://help.ratiocoffee.com/g -
Baratza, Vario+ Operations Manual, January 2022, version 1.5 as printed in the retrieved document. Model-specific starting settings and adjustment instructions.
https://assets.breville.com/ZCG887/manual-varioplus-en-v1-6_082123.pdf -
Baratza, Switching Grind Settings with Confidence, undated, retrieved November 2026. Manufacturer guidance on adjustment and retained grounds.
https://www.baratza.com/en-us/blog/product-guides/switching-grind-settings-with-confidence -
Baratza, Dialing in Espresso: Burr Types, Adjustments, and Troubleshooting, undated, retrieved November 2026. Manufacturer guidance on fixed doses, small adjustments and taste-plus-flow troubleshooting.
https://www.baratza.com/en-au/blog/product-guides/dialing-in-espresso -
Cameron, M. I., and colleagues, Systematically Improving Espresso: Insights from Mathematical Modeling and Experiment, Matter, 2020. Peer-reviewed mathematical modelling and brewing experiments.
https://www.hospitalitynet.org/file/152008777.pdf -
Specialty Coffee Association, Home Coffee Grinders: Specifications and Test Methods, SCA Standard 320-2021, copyright 2022. Grind-quality assessment using particle-size distributions.
https://sca.coffee/research/coffee-standards -
Bialetti, Moka Express Instruction/Warning Sheet, undated manufacturer document retrieved November 2026. Moka-specific grounds, avoidance of excessively fine coffee and no pressing into the funnel.
https://m.media-amazon.com/images/I/913VOwvygKL.pdf
Research combined manufacturer brewing instructions, an SCA equipment standard and peer-reviewed espresso research; texture analogies are illustrative, and no first-hand equipment testing is claimed.
Last checked: November 2026