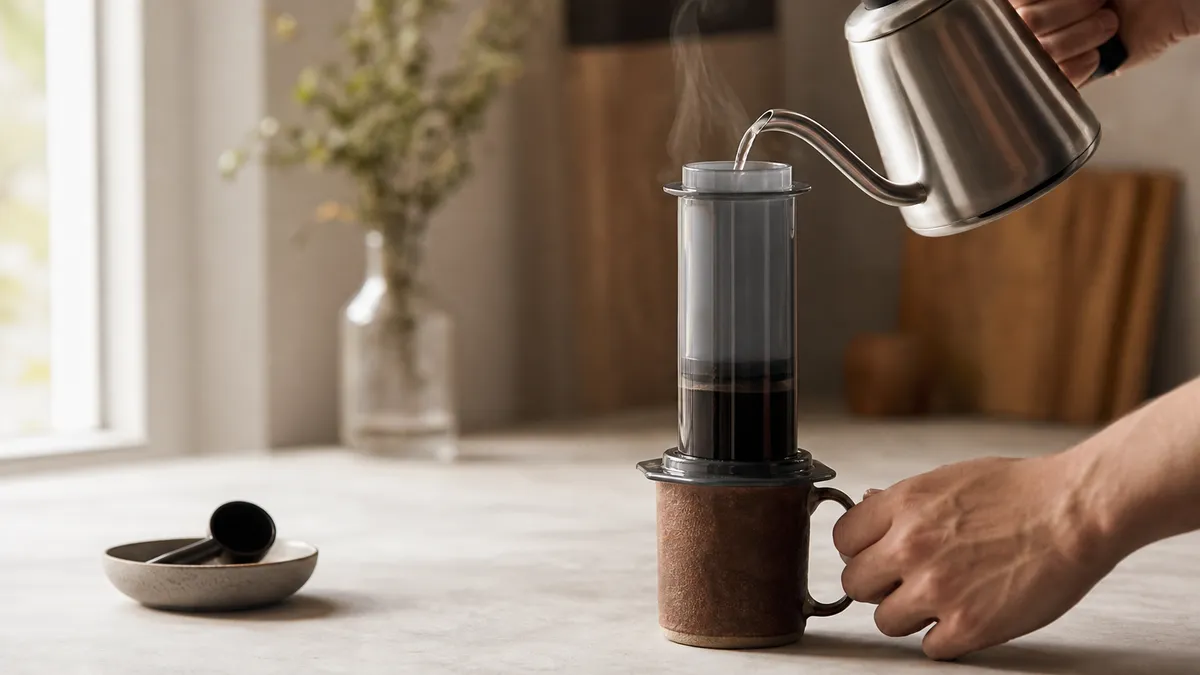
An AeroPress makes coffee by steeping ground coffee in water, then pressing the liquid through a filter into a mug. Start with the traditional upright method: the suggested recipe below uses 16 g of coffee and 240 g of water, while avoiding the hot-water flip involved in inverted brewing.
In short
- Start with a medium-fine grind, finer than typical filter coffee but coarser than espresso.
- For the upright starting recipe, use a coffee-to-water ratio of 1:15 by weight.
- Press gently. If the plunger resists strongly, stop rather than pushing harder.
- Paper filters suit a cleaner-textured cup; metal filters allow more oils through for fuller body.
- AeroPress strongly discourages inverted brewing because of instability and burn risk. A compatible flow-control cap provides drip-free steeping without turning the brewer upside down.
AeroPress Brewing Steps
The AeroPress combines immersion, where coffee grounds steep in water, with filtration driven by hand pressure. The chamber holds the coffee and water; the plunger pushes the brewed liquid through a filter held in the removable cap.
This gives you separate controls over steeping and pressing. For context on how it differs from other equipment, see our guide to brewing methods.
For the instructions below, use an AeroPress Original with its standard filter cap. Other versions have different capacities and accessories, so follow your model’s instructions rather than assuming every recipe will fit.
Gather:
- The chamber, plunger and filter cap.
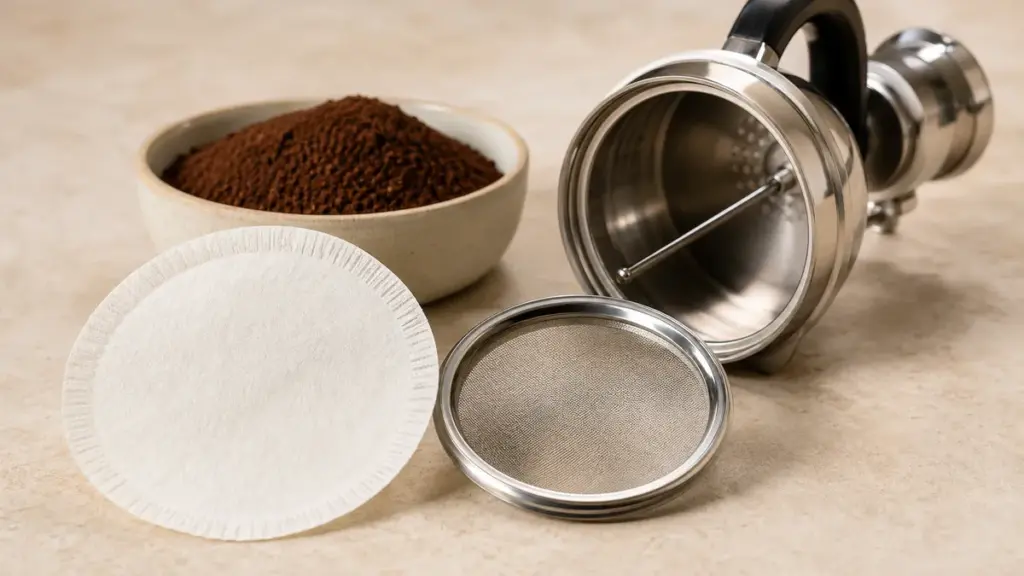
- A correctly sized paper filter.
- Coffee and a grinder, or suitable pre-ground coffee.
- A kettle, scales, timer and stirrer.
- A sturdy mug that supports the brewer securely.
Use fresh drinking water without an obvious chlorine smell. The Specialty Coffee Association’s water guidance supports clean, odour-free, chlorine-free brewing water, but its electrical home-brewer test standard is not an AeroPress recipe.
Safety first: work on a stable surface, keep children away from the brewing area and never press into thin or delicate glassware. Use scales to measure the ingredients, then move the mug and brewer off them before pressing.
Traditional Method
The traditional method keeps the filter cap at the bottom and the brewer upright on the mug throughout. It is the manufacturer’s standard arrangement and the recommended starting point here.
A measured upright starting recipe
These are suggested brewing settings, not a claim of first-hand testing or a universal optimum:
- Coffee: 16 g, medium-fine grind.
- Water: 240 g, approximately 240 ml when measured before heating.
- Ratio: 1:15, coffee to water by weight.
- Water temperature: 85°C.
- Steep: 60 seconds after stirring.
- Press: aim for about 30 seconds, without forcing it.
AeroPress’s current instructions specify 85°C and include different steeping times for different preparations. This measured recipe uses a longer starting steep so that you have a clear baseline to adjust.
- Fit the filter. Place a paper filter flat inside the standard cap and twist the cap securely onto the chamber.
- Set up upright. Stand the chamber on the sturdy mug. Add the 16 g of coffee and gently shake to level the grounds.
- Add the water. Start the timer and pour in 240 g of water at 85°C. Some early dripping through the standard cap is normal.
- Stir briefly. Stir gently for about 3 seconds, wetting any dry pockets.
- Insert the plunger. Fit its seal just inside the chamber opening. The manufacturer advises a slight upward movement after insertion to reduce further dripping. Do not pull it out.
- Wait 60 seconds. Leave the brewer upright and undisturbed.
- Press gently. Move the assembly off the scales. Apply steady downward pressure, aiming for roughly 30 seconds. If it becomes difficult, ease off rather than trying to meet the timer.
- Finish and clean. Remove the brewer carefully. The cap will be hot: cool it under running water or use a cloth before unscrewing it, then eject the grounds and paper and rinse the parts.
Treat pressing time as feedback, not a strength test. A slightly slower comfortable press is preferable to forcing a resistant coffee bed.
Adjusting the next cup
Keep the coffee dose and water quantity unchanged while adjusting one other setting. Otherwise, you cannot tell which change helped.
If the cup tastes thin and sharply sour, try a slightly finer grind or a longer steep. If it tastes harsh or drying, try a coarser grind or less agitation. These are troubleshooting experiments, not certain diagnoses: the coffee itself can also be acidic, bitter or heavily roasted.
Inverted Method
Burn-risk warning: AeroPress strongly discourages inverted brewing. The brewer is less stable upside down, and tipping or separation can expose you to hot liquid. The recommended alternative is upright brewing with a compatible flow-control cap.
Inverted brewing means assembling the plunger inside the chamber and standing the brewer on the plunger, with the open chamber facing upwards. Coffee and water steep together before the filter cap is attached; the assembly is then turned upright over a receiving vessel and pressed.
Its attraction is control over the steep: water cannot drip through the filter while the cap is absent. However, that adds a handling step involving an open or recently closed vessel of hot coffee. This guide therefore explains the technique without recommending a hot-water flipping procedure.
Get the same control without inversion
According to AeroPress, its pressure-actuated Flow Control Filter Cap prevents dripping until pressing begins. That lets you extend the steep or experiment with coarser grounds while the brewer remains upright.
Choose a cap explicitly compatible with your model and follow its fitting instructions. It is a safer alternative to inversion because it removes the flip, not because it removes all hot-water risk.
Our recommendation is to learn upright brewing first. Inversion should not be treated as a necessary upgrade or evidence of a better cup.
AeroPress Ratios, Recipes and Concentrates
A brew ratio describes the dry coffee and added water by weight. For example, 16 g of coffee with 240 g of water is 1:15.
It does not mean that 240 g of beverage will reach the mug: some water remains with the grounds. For repeatable brewing, record the water you add separately from any later dilution.
The following are suggested starting recipes for upright brewing, not competition formulas or laboratory-validated optima. Use the same basic sequence as above, with a compatible flow-control cap where specified.
| Preparation | Coffee and brewing water | Suggested starting settings | Finish |
|---|---|---|---|
| Everyday black coffee | 16 g coffee, 240 g water; 1:15 | Standard cap; 85°C; steep 60 seconds, press gently | Taste before adding anything |
| Concentrate | 18 g coffee, 90 g water; 1:5 | Flow-control cap; 85°C; steep 60 seconds, press gently | Dilute gradually with hot water or milk |
| Coffee over ice | 15 g coffee, 150 g water; 1:10 in the chamber | Flow-control cap; 85°C; steep 60 seconds, press gently | Press into a sturdy mug, then add 90 g ice |
For the iced version, the total brewing water plus ice is 240 g, giving a nominal overall ratio of 1:16 if all the ice melts. Transferring the brewed coffee to a serving glass afterwards avoids pressing directly into delicate glassware.
This is hot-brewed iced coffee, not a long cold extraction. Our iced coffee comparison explains the distinction.
Using concentrates
A concentrate is useful when you want a smaller, stronger base for dilution. AeroPress itself publishes short-water recipes intended for milk drinks, although the suggested concentrate above uses a less extreme ratio than its published espresso-style example.
Add dilution gradually, tasting as you go. Record the amount once you find the strength you like.
Call the result concentrated or espresso-style coffee rather than treating it as interchangeable with pump espresso. The manufacturer acknowledges that its espresso terminology describes how the coffee can be enjoyed, rather than equivalence to conventional espresso pressure. See espresso drink differences for the separate terminology.
Paper and Metal Filters
Paper is the straightforward starting choice when you want a cleaner-textured drink. AeroPress describes its reusable metal filter as allowing more oils through, producing a fuller-bodied cup.
Choose by texture rather than assuming one filter is superior:
- Paper: start here for a cleaner cup and simple grounds disposal.
- Metal: try this if you prefer a richer mouthfeel and are willing to clean a reusable filter.
If you enjoy the substantial texture associated with a French press, metal filtration is worth exploring. It will not make the two brewers identical.
Check filter size and cap compatibility before brewing. Fit the filter flat, without trapped grounds around its edge, and follow the cleaning instructions for the particular filter.
When comparing paper and metal, keep the beans, dose, water and steep unchanged initially. That makes the effect of filtration easier to judge.
Troubleshooting AeroPress Coffee
Separate strength, how concentrated the drink is, from extraction, how much soluble material has left the grounds. A weak cup is not automatically under-extracted, and a strong cup is not automatically over-extracted.
Use this table to choose one next adjustment.
| Symptom | Likely cause | Next adjustment |
|---|---|---|
| Thin, sharply sour coffee | Insufficient extraction is one possibility | Grind slightly finer or extend the steep |
| Harsh, drying coffee | Fine grinding or vigorous agitation may contribute | Grind coarser or stir less |
| Weak but otherwise pleasant | Too much water for your preferred strength | Reduce dilution or use a little more coffee |
| Plunger very hard to move | Fine particles, a blocked filter or a compacted bed | Stop forcing; try coarser grinding next time |
| Excessive early dripping | Coarse grounds or an imperfect plunger seal | Check the seal, level the bed and consider a compatible flow-control cap |
AeroPress specifically warns that pressing hard can compact the grounds and make pressing more difficult. Gentle pressure is both the normal technique and the first response to resistance.
What extraction research can tell you
A controlled laboratory study by Liang, Chan and Ristenpart, published in Scientific Reports in 2021, investigated full-immersion coffee at equilibrium, when further steeping produces little additional change. Brew ratio strongly influenced dissolved-solids concentration, while grind size and temperature had limited influence on final extraction within the tested conditions.
That does not establish an ideal AeroPress steeping time. A short AeroPress brew need not reach equilibrium, and pressing introduces flow through a coffee bed.
The useful distinction is between how quickly extraction happens and where a long immersion eventually finishes. Use research to understand the controls, then use a recorded recipe and your own taste to choose the next adjustment.
FAQ
Can I use supermarket pre-ground coffee?
Yes, medium-ground pre-ground coffee is a workable starting point. AeroPress includes a preparation for it in its current instructions, with a longer wait than its fresh medium-fine preparation. You cannot change its grind, so adjust steeping time first while keeping the dose and water consistent. Use the result as a baseline rather than expecting every bag to behave alike.
Must I stop pressing as soon as I hear a hiss?
No, the hiss is not an automatic fault. AeroPress’s current instructions describe pressing through the beginning and end of the hiss, which signals air passing through near the finish. There is no need to force the last drops out. Choose a comfortable finishing point and keep it consistent when comparing recipes.
Can I simply double the recipe for two mugs?
Do not assume a doubled recipe will fit your brewer. AeroPress models have different capacities, and coffee grounds occupy space as well as water. Two separate brews are the simplest approach. Alternatively, use a suitable concentrate recipe and dilute after pressing, checking your model’s instructions rather than filling the chamber to the brim.
Where to go next
Read Brewing Methods to place the AeroPress alongside other ways of making coffee. French Press is useful for comparing immersion and filtration, while Cold Brew vs. Iced Coffee explains the chilled-drink options. For your next AeroPress brew, change just one setting and record what happened.
Sources
Manufacturer pages below are undated unless otherwise stated; their instructions and product claims were checked in November 2026.
-
AeroPress, “How To Use AeroPress”, undated. Standard upright arrangement, preparation, temperature, steeping and cleaning instructions.
https://aeropress.com/pages/how-to-use -
AeroPress, “FAQs For The AeroPress Coffee Maker”, undated. Inverted-method warning, pressing resistance, receiving vessels and model differences.
https://aeropress.com/pages/faq -
AeroPress, “What grind size should I use?”, undated. Medium-fine starting grind, flow resistance and grind adjustment.
https://aeropress.com/pages/what-grind-size-should-i-use -
AeroPress, “Do you recommend using a metal filter?”, undated. Manufacturer’s explanation of oil passage and fuller body.
https://aeropress.com/pages/do-you-recommend-using-a-metal-filter-in-the-aeropress -
AeroPress, “How does the AeroPress Flow Control Filter Cap work?”, undated. Pressure-actuated valve and prevention of drip-through.
https://help.aeropress.com/en-US/how-does-the-aeropress-flow-control-filter-cap-work-227115 -
AeroPress, “AeroPress Flow Control Filter Cap Recipes”, undated. Published concentrate preparation and use in milk drinks.
https://aeropress.com/pages/aeropress-flow-control-filter-cap-recipes-site -
AeroPress, “Do AeroPress coffee makers make real espresso?”, undated. Manufacturer’s distinction between conventional espresso pressure and espresso-style use.
https://help.aeropress.com/en-US/do-aeropress-coffee-makers-make-real-espresso-123208 -
Specialty Coffee Association, Home Coffee Brewers: Specifications and Test Methods, SCA Standard 310-2021, retrieved edition copyright 2022, sections 2 and 7.1.4. Scope and brewing-water characteristics.
https://sca.coffee/research/coffee-standards -
Liang, J., Chan, K. C. and Ristenpart, W. D., “An equilibrium desorption model for the strength and extraction yield of full immersion brewed coffee”, Scientific Reports 11, 6904, 2021. Controlled laboratory research and modelling.
https://pmc.ncbi.nlm.nih.gov/articles/PMC7994670/
This article was researched using manufacturer instructions, SCA documentation and peer-reviewed immersion research; suggested recipe variations are editorial starting points, not first-hand test results.
Last checked: November 2026