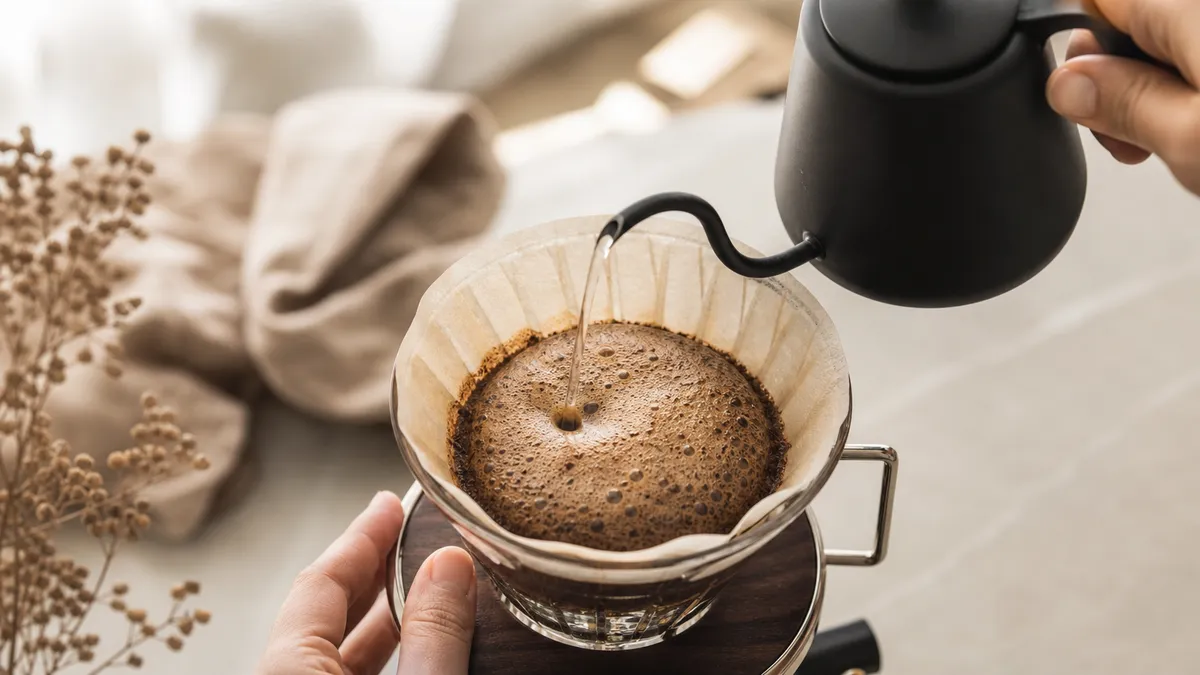
Pour-over coffee is made by pouring hot water over ground coffee in a filter, allowing the brewed coffee to drain into a cup or server. For a useful starting point, use 15 g of coffee with 250 g of water in a V60, or 30 g with 500 g in a Chemex, then adjust the grind according to taste and drainage.
In short
- Start with water at 94 degrees Celsius, measured in the kettle before pouring.
- Use a medium-fine grind for the V60 and a medium-coarse grind for the Chemex.
- Wet all the grounds during the bloom, the initial small pour, before adding the remaining water.
- With a folded Chemex filter, position the three-layer side over the pouring spout so the air channel stays open.
- Treat brew times as diagnostic guides, not deadlines: change a good-tasting brew only if you want a different result.
V60 Pour-Over
The V60 is a cone dripper with spiral ribs and a large drainage hole. Your grind and pouring technique help determine how quickly water passes through the coffee, making it a useful brewer for learning controlled, repeatable pouring.
It belongs to the wider family of brewing methods that use gravity rather than pump pressure. For the distinction between hand pouring and automatic filter machines, see drip brewing.
Equipment and starting recipe
You need a V60 02 dripper, matching paper filter, mug or server, scales, timer, grinder and kettle. A gooseneck kettle makes a controlled stream easier, but the immediate aim is steady pouring rather than elaborate equipment.
Use:
- Coffee: 15 g, ground medium-fine.
- Brewing water: 250 g, a coffee-to-water ratio of approximately 1:16.7 by weight.
- Water temperature: 94 degrees Celsius.
- Additional water: enough to rinse the paper and warm the brewer.
- Initial total-time target: 2 minutes 30 seconds to 3 minutes 30 seconds, including the bloom.
These are editorial starting instructions adapted from the manufacturer and brewing guides listed below, not a claim of first-hand testing or an official standard. The water amount is the input, not the finished drink volume: some water remains in the grounds. Use grams for brewing; Hario describes its corresponding single-mug recipe as 250 ml of water, but weighing avoids relying on jug markings.
Numbered V60 method
- Rinse and warm. Fit the paper into the dripper, set it over your mug or server and thoroughly wet it with hot water. Discard the rinse water.
- Prepare the bed. Add 15 g of medium-fine coffee and gently shake the dripper to level it. Place the complete assembly on the scales and zero them.
- Bloom from 0:00. Start the timer and pour 45 g of water across the grounds. Give the dripper a small, gentle swirl to mix any dry pockets into the wet coffee.
- Wait until 0:45. This is the bloom period. Look for complete wetting rather than a particular amount of bubbling.
- First main pour. Pour in small, overlapping circles until the scales read 150 g, aiming to reach that total around 1:15. Keep the stream over the coffee rather than the exposed paper.
- Second main pour. After a brief pause, continue to a cumulative total of 250 g, aiming to finish pouring around 1:45. Do not add another 250 g.
- Let it drain. If grounds sit conspicuously above the waterline, try one gentle finishing swirl. Remove the dripper when the main flow has slowed to occasional drips, initially aiming for the total-time window above.
- Mix and taste. Stir the finished coffee before drinking. Record the grind, total time and flavour so the next adjustment has a clear purpose.
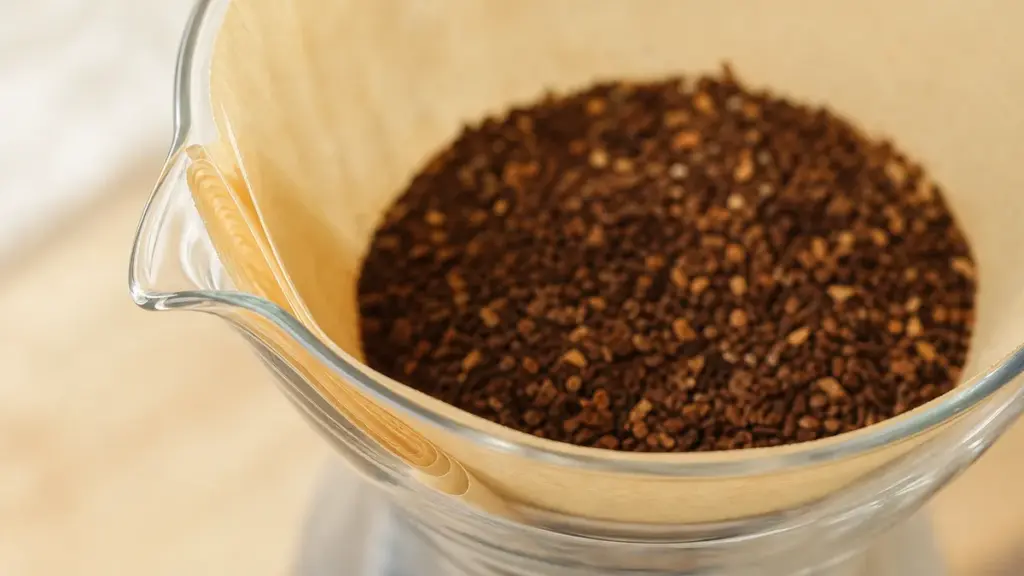
V60 Techniques
Blooming: wetting matters more than spectacle
The bloom wets the coffee and allows trapped roasting gases to escape. Its practical purpose is to avoid leaving dry clumps while water starts travelling through the rest of the bed.
A large foaming dome is not the objective. If a dry patch remains, direct a little of the measured bloom water towards it or use a gentle swirl; do not keep adding unmeasured water.
Evidence does not establish one universally superior bloom movement. In its own small brewing experiments, Barista Hustle found no significant difference in final dissolved-solids concentration between the bloom preparations it compared. That supports a restrained approach: make wetting repeatable rather than treating a particular stirring ritual as essential.
Pulses and pour patterns
A pulse is a separate addition of water with a pause before the next. The recipe above uses a bloom followed by two main pours, giving you manageable checkpoints without requiring constant stop-start pouring.
Keep the pattern simple: start near the centre, widen the circles across the coffee bed, then move back in. Avoid repeatedly pouring directly down the bare filter wall. Consistency is more useful than tracing a perfect spiral.
For a comparison, try replacing the two main pours with one steady pour while keeping the coffee, water and grind unchanged. Compare taste and drainage before deciding which pattern to retain.
Swirling and agitation
Agitation means movement that mixes the grounds and water. Pouring creates agitation already; swirling adds more.
Begin with a small bloom swirl and make the finishing swirl optional. If the last stage drains very slowly, try omitting the finishing swirl before changing several other variables. Fine particles, often called fines, can obstruct the filter, and excessive agitation can encourage this problem.
Controlled, peer-reviewed experiments published in Physics of Fluids in 2025 showed that pour height and flow rate can change mixing and extraction. The researchers investigated model particles and real coffee, not a universally best-tasting household recipe. The useful lesson is to keep kettle height and stream strength consistent, not to pour from the greatest possible height.
Chemex Pour-Over
A Chemex combines the brewing cone and serving vessel. Its thick proprietary paper is associated with a particularly clean, sediment-light cup, but correct filter placement matters as much as the pouring pattern.
Equipment and starting recipe
Use a six-cup Chemex with its correctly matched paper filter, plus scales, timer, grinder and kettle.
Start with 30 g of medium-coarse coffee and 500 g of water, approximately 1:16.7 by weight, at 94 degrees Celsius. Allow additional water for rinsing. The following schedule is an editorial adaptation of the Chemex guides, with an initial total-time target of 4 to 5 minutes, not a manufacturer-prescribed requirement.
Numbered Chemex method
- Position the paper. Open the folded filter into a cone with three layers on one side and one on the other. Put the three-layer side against the pouring spout.
- Rinse thoroughly. Wet the paper with hot water to warm the vessel, then discard that water while keeping the filter correctly seated. Confirm that the spout channel remains open.
- Add the coffee. Put 30 g of medium-coarse grounds into the filter and level the bed. Zero the scales.
- Bloom from 0:00. Pour 90 g of water across the grounds. Swirl gently if necessary to wet dry patches, then wait until 0:45.
- Pour to 250 g. Add water in controlled circles, aiming to reach this cumulative total around 1:30. Keep the water safely below the filter rim.
- Pour to 500 g. Continue after a brief pause, aiming to finish adding water around 2:45. If the cone is filling faster than it drains, pause rather than overfill it.
- Allow drawdown. Drawdown is the final drainage after pouring stops. Initially aim to finish around 4 to 5 minutes from the first bloom pour.
- Remove and serve. Lift out the filter when the main flow has ended. Gently swirl the brewed coffee in the carafe before dividing it between mugs.
Chemex Tips and Tricks
Check the air channel before blaming the grind
The spout is also an escape route for air displaced by coffee entering the vessel. Chemex specifies the three-layer filter orientation to help prevent the wet paper collapsing into this channel.
If drainage suddenly stops, inspect the spout first. A blocked air channel and an excessively fine grind can both produce slow brewing, but they need different remedies.
Rinsing is useful, although Chemex says it is not compulsory. Here it serves two practical purposes: warming the vessel and washing away loose paper fibres. Always discard the rinse water before brewing.
Troubleshoot by symptom
These are likely causes, not certain diagnoses. Keep the recipe fixed while testing one change at a time.
| Symptom | Likely cause | Fix |
|---|---|---|
| Thin, sharp coffee with unusually fast drainage | Grind too coarse or incomplete wetting | Check the bloom, then try a slightly finer grind |
| Slow drainage and a harsh or hollow cup | Grind too fine, filter obstruction or excessive agitation | Pour more gently; if needed, grind slightly coarser |
| Chemex flow stops abruptly | Filter sealing the spout channel | Check the three-layer orientation and restore the air gap |
| Strong paper-like taste | Insufficiently rinsed paper | Thoroughly rinse a fresh filter and discard the water |
| Different results with the same dose | Inconsistent pouring or a changed filter | Fix the paper type, pour pattern and kettle height |
Do not assume every sour note means under-extraction or every bitter note means over-extraction. Use flavour alongside drainage and the changes you have actually made.
Water and the limits of standards
For UK tap water, check your supplier’s local water-quality report rather than assuming one national hardness level. If you use a filter, check what it removes rather than assuming every filter changes mineral content equally.
For context, SCA Standard 310-2021 specifies test water with calcium hardness equivalent to 50 to 175 mg/L as calcium carbonate, alkalinity equivalent to 40 to 70 mg/L as calcium carbonate, and pH 6 to 8. Hardness and alkalinity are different measurements; “as calcium carbonate” is their shared reporting basis.
Those figures belong to an electrical home-brewer testing standard that explicitly excludes manual pour-over devices. They are useful context, not certification limits your V60 or Chemex recipe must meet.
FAQ
Can I make pour-over without a gooseneck kettle?
Yes, provided you can pour a small, controlled stream safely. Practise pouring water into an empty vessel before brewing, then keep the kettle close enough for control without touching the filter. A gooseneck helps with precision, but weighing the water and thoroughly wetting the grounds remain useful starting habits.
Can I use pre-ground coffee?
Yes, but ask for a grind suited to your brewer. Medium-fine is the starting point here for V60, while Chemex recommends medium-coarse. With pre-ground coffee you cannot adjust that variable between brews, so keep the dose and water fixed while experimenting cautiously with pouring and agitation.
Can I simply double the recipe?
You can double the coffee and water while preserving the ratio, provided the brewer has enough capacity. Do not assume the original pouring schedule or finish time will still apply. Hario permits scaling its recipe for two people, but treat the larger brew as something to adjust rather than forcing it to match the smaller brew’s timer.
Where to go next
For the wider context around pour-over, read Coffee Brewing Methods: The Complete Guide; for automatic filter preparation, continue with Drip Brewing. Read Espresso Dialling In: Dose, Yield and Time if you also use an espresso machine and want to distinguish its dose-to-yield measurements from filter coffee’s coffee-to-water ratio.
Sources
-
Hario UK, Expert V60 Brew Guide, undated. Manufacturer guidance on dose, water, grind, rinsing and pouring.
https://www.hario.co.uk/pages/brew-guides-v60-expert -
Baratza, Hario V60 Brew Guide, undated. Manufacturer guidance on pulse pouring, agitation, filter obstruction and adjustment by taste.
https://www.baratza.com/en-us/blog/brew-guides/hario-v60-brew-guide -
Chemex, FAQ, undated. Manufacturer instructions covering filter orientation, rinsing, grind and drainage faults.
https://chemexcoffeemaker.com/pages/faq -
Chemex, How to Brew with Chemex, undated. Manufacturer demonstration of filter folding and the spout air channel.
https://chemexcoffeemaker.com/pages/how-to-brew-with-chemex -
Chemex Canada, Chemex Brew Guide, 2020. Published larger-batch recipe and staged pouring guidance.
https://chemex-canada.ca/blogs/news/chemex-brew-guide -
Specialty Coffee Association, Home Coffee Brewers: Specifications and Test Methods, SCA Standard 310-2021, retrieved file labelled dev03. Scope and section 7.1.4 water-testing specifications.
https://sca.coffee/research/coffee-standards -
Park, E., Young, M. and Mathijssen, A. J. T. M., Pour-over coffee: Mixing by a water jet impinging on a granular bed with avalanche dynamics, Physics of Fluids, 37, 043332, 2025. Peer-reviewed experimental research, author-hosted paper.
https://bpb-us-w2.wpmucdn.com/web.sas.upenn.edu/dist/8/725/files/2025/04/30.pdf -
Barista Hustle, Blooming Marvellous, 2021. Original small-scale brewing experiments, not peer-reviewed research.
https://www.baristahustle.com/blooming-marvellous/
This article was researched using retrieved manufacturer guides, the identified SCA document and original experimental research; the numbered recipes are editorial adaptations, not first-hand test results.
Last checked: November 2026