Better percolator coffee comes from controlling heat and brewing time, not letting the pot bubble until the coffee looks dark enough. Start with a coarse grind, reduce the heat once circulation begins, and stop at a repeatable time rather than repeatedly boiling the finished brew.
In short
- Use a coarse or manufacturer-recommended percolator grind, with no loose grounds down the central tube.
- A useful starting dose is 55 g per litre of water, adapted from SCA filter-brewing guidance rather than a percolator-specific standard.
- For a stovetop trial, start with 5 minutes of gentle percolation, measured from the first visible circulation, unless your manual specifies otherwise.
- Do not count bubbles as brewing cycles. Control duration, heat and repeated recirculation instead.
- On an automatic electric model, follow its completion signal and avoid starting a second brewing cycle to strengthen the coffee.
How a percolator brews coffee
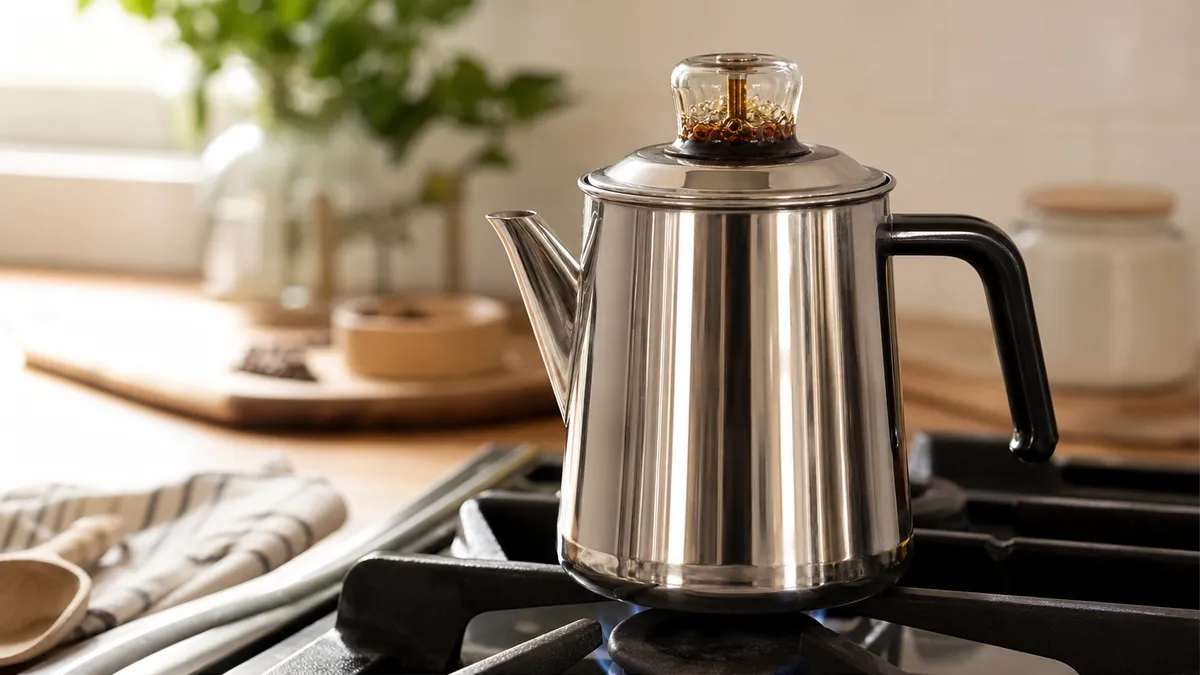
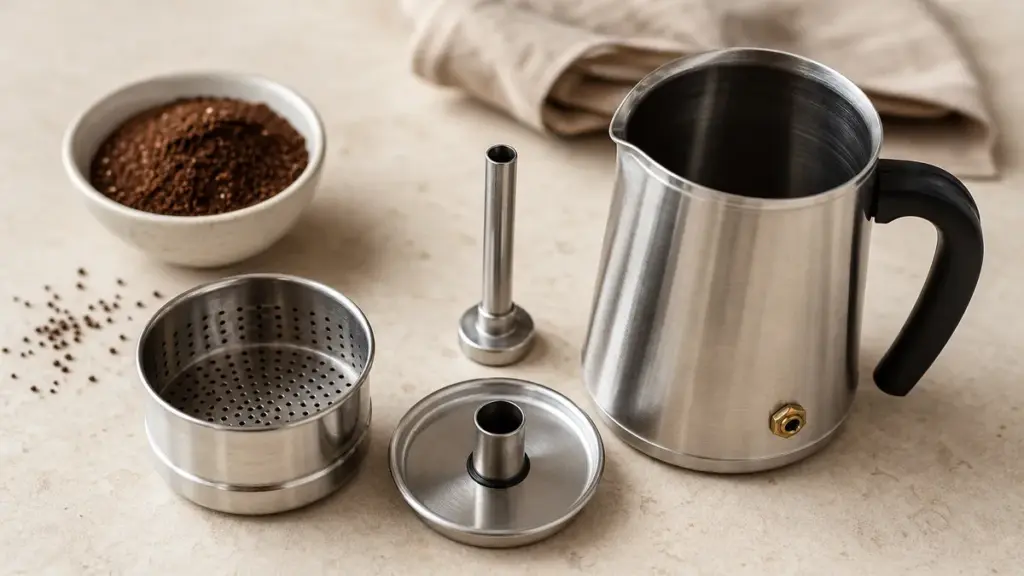
A percolator has a water chamber, a central pump tube and a perforated basket holding the grounds above the liquid. Heating drives liquid up the tube; it spreads over the coffee, drains through the basket and returns to the chamber below. As brewing continues, liquid containing extracted coffee passes through the grounds again.
That repeated circulation is the defining feature. It also makes time and heat closely connected: leaving the pot running changes both extraction and the amount of heating the brewed coffee receives.
The glass knob, where fitted, helps you see that liquid is circulating. Treat it as an activity indicator, not a reliable strength meter.
For the wider picture, our brewing methods hub explains where different brewing approaches fit. Here, the practical aim is narrower: make a repeatable percolator brew without unnecessary heat or recirculation.
Choose your grind, dose and water
Start coarse, but follow the basket
Use coffee ground for a percolator, or begin with a coarse setting when grinding your own beans. COLETTI recommends coarse grounds, while the electric manuals consulted also permit regular or percolator grind. Basket design and any permitted paper filter therefore matter more than a universal grinder number.
Keep grounds out of the central tube when filling the basket. If your model accepts a paper filter, use the specified shape and fit it according to the manual. A correctly fitted filter can help keep particles out of the drink; an improvised arrangement is not a substitute for checking compatibility.
Weigh the coffee and water
Use 55 g of coffee per litre of water as an initial experiment, provided the basket accommodates it within the manufacturer’s instructions. This comes from SCA filter-brewer guidance, not a validated optimum for every percolator.
For the method below, that means 33 g coffee with 600 g water, approximately 600 ml: a coffee-to-water ratio of about 1:18.2 by weight. Scale the batch to your pot’s permitted minimum and maximum fill levels.
Measuring the water avoids relying on an undefined “cup”. Record the actual quantity you use so the next batch is comparable.
Keep the water consistent
Start with fresh cold drinking water where your manual specifies it. The SCA’s published brewing-water guidance calls for clean, odour-free water without chlorine.
For troubleshooting, keep the water source unchanged while adjusting the brew. Changing water, grind and time together makes it harder to identify which change helped.
Stovetop percolator brewing: a numbered method
This is a starting experiment, not a manufacturer-certified recipe. Your pot’s instructions take priority, especially for minimum fill, hob compatibility and safe handling.
You need: a compatible stovetop percolator, scales, timer, coarse-ground coffee, water and an oven glove or suitable heat protection.
-
Check the batch size.
Use 600 g water, approximately 600 ml, and 33 g coffee only if that water quantity falls within your pot’s permitted fill range. Otherwise scale both quantities together, keeping the initial dose at 55 g per litre. -
Fill and assemble while cold.
Add the water, fit the pump tube and basket, then add the coffee without dropping grounds into the tube. Fit the basket cover or spreader and secure the main lid as instructed. -
Heat according to the manual.
Stay with the pot. Once liquid visibly rises into the knob, where fitted, or regular percolating becomes apparent, start the timer. -
Reduce the heat to maintain gentle circulation.
Aim for steady perking rather than aggressive boiling or spitting. Do not chase a rigid number of bubbles per second. If circulation stops entirely, increase the heat cautiously until it resumes. -
Use 5 minutes as the first timed trial.
This sits within COLETTI’s published 4 to 7 minute guidance, but it is not a universal endpoint. Keep the lid closed during brewing. Do not open a hot, active pot to insert a thermometer: the SCA’s historical 92 to 96°C filter-brewer benchmark is context, not a temperature setting you can assume a percolator achieves. -
Remove the pot from the heat and serve carefully.
Use the handle and appropriate heat protection, following the manufacturer’s pouring instructions. Do not leave the pot on an active ring while drinking the first cup. -
Record the result before changing anything.
Note dose, water quantity, grind, heat setting and timed percolation. For the next batch, change just one variable. A 30-second timing adjustment is a suggested testing increment, not an evidence-based threshold.
Taste after the coffee has cooled enough to assess comfortably. Describe the problem specifically: excessively concentrated, thin, gritty, sharply bitter or drying. Those observations are more useful than simply “too strong”.
Electric percolators: let the controls do their job
An automatic electric percolator manages the transition from brewing to keeping warm. For example, the Farberware manual consulted says percolation stops when brewing is complete, after which the appliance switches to its keep-warm setting. Presto uses a signal light to indicate readiness.
Do not impose the stovetop five-minute experiment on an automatic model. Follow its manual, including cold-water starting instructions and any procedure for consecutive batches.
For improvement, concentrate first on a consistent batch size, weighed dose, permitted grind and clean assembly. Avoid repeatedly restarting the brewing cycle to make weak coffee stronger: diagnose the weak brew instead.
When brewing has finished, serve or transfer the coffee if you do not need the keep-warm function. Disconnect the appliance as instructed. Never use an electric percolator on a hob, and never immerse its electrical body or base unless its own instructions explicitly permit it.
How long should it brew, and how many cycles?
There is no useful universal count of visible “cycles”. A pulse into the knob does not tell you that the whole pot has passed through the grounds once. Counting pulses gives an impression of precision without measuring the variable you actually need.
Instead, control:
- Duration: use the same starting point for your timer.
- Heat: maintain gentle, repeatable circulation.
- Batch size: stay within the manufacturer’s operating range.
- Recirculation: stop at the chosen endpoint rather than continuing indefinitely.
Manufacturer timings are not identical. Even COLETTI’s support guide gives 4 to 7 minutes, while its separate tips page suggests 3 to 5 minutes for a regular brew. These are practical manufacturer recommendations, not evidence for a single scientifically optimal duration.
Use your model’s instructions first, then make small, recorded adjustments. Do not borrow timing directly from Vietnamese phin brewing or another method simply because water also passes through a coffee bed.
Why extended boiling and recirculation can impair flavour
Extraction is the movement of soluble material from the grounds into the brewing liquid. Temperature affects how quickly extraction proceeds. In a percolator, continuing to heat also continues the opportunity for liquid to circulate through the grounds, so extending the brew is not simply keeping an otherwise finished drink warm.
The practical inference is to avoid unnecessary duration and aggressive boiling. However, “hotter water always makes bitter coffee” is too simple.
A controlled drip-coffee study tested brewing at 87°C, 90°C and 93°C, adjusting grind and time to match strength and extraction. Temperature itself had little effect on the sensory profile under those conditions. That does not validate prolonged percolator boiling: the experiment did not test boiling or repeated recirculation.
Holding also deserves nuance. A separate controlled drip-coffee study found sensory changes during storage and suggested loss of volatile aroma compounds was a principal concern. Yet its professional panel did not prefer fresh coffee over held coffee overall.
Neither study establishes a universal percolator cut-off. Together, they support separating extraction, strength and holding rather than blaming every unpleasant cup on temperature alone.
Troubleshooting percolator coffee
Use this table as a diagnostic sequence, not proof of a single cause.
| Symptom | Likely cause to investigate | Fix |
|---|---|---|
| Bitter, harsh coffee | Extended brewing, aggressive heat or accumulated coffee residue | Clean first; then trial gentler heat or a shorter duration |
| Weak coffee with poor circulation | Mis-seated tube, restricted washer or sediment in the well | Cool and disconnect; inspect and clean the assembly |
| Weak coffee despite normal circulation | Dose or grind does not suit the batch | Check weighed quantities; adjust one variable next time |
| Grounds in the cup | Grounds entered the tube, unsuitable grind or vigorous perking | Fill carefully, use the permitted grind and check filter compatibility |
| Liquid spits from the spout | Excessive heat or overfilling | Reduce heat safely and check the permitted fill level |
| Good initially, less appealing later | Holding-related sensory change | Compare a freshly served portion with a later one before changing the recipe |
For a different route to repeatability, Clever Dripper and Hario Switch covers alternative brewers. Our method chooser helps decide whether to persevere with percolator brewing or change approach.
Clean the parts that control circulation
Let the appliance cool and disconnect electric models before cleaning. Follow the manual for washing the basket, spreader, tube, lid and interior, including any dishwasher restrictions.
Pay particular attention to the pump-tube seating area and any moving washer. Presto identifies sediment, a stuck washer and incorrect seating as possible causes of weak coffee. Farberware also warns that accumulated oil and coffee stains can cause bitterness.
Do not copy a deep-cleaning chemical recipe from another appliance. Use the cleaning and descaling products, concentrations and procedures approved for your model.
FAQ
Can I use ordinary pre-ground coffee?
Yes, if your manufacturer’s instructions permit its grind. The electric manuals consulted allow regular or percolator grind, while COLETTI recommends coarse grounds. If particles pass through your basket, check whether the model accepts a specified paper filter rather than assuming every packet labelled “ground coffee” will behave identically.
Should I start with hot water to shorten the wait?
Not unless your manual permits it. Both electric manuals consulted specify fresh cold water, and Presto warns that starting another batch in a warm appliance can produce weak coffee. Treat hot-start advice for other brewing equipment as method-specific, not a rule to transfer automatically to a percolator.
Should I remove the basket immediately after brewing?
Follow your model’s instructions, without risking a burn. Farberware recommends removing the basket, spreader and pump tube after brewing for best flavour, but explicitly warns that the parts are hot. Never remove the lid during active brewing, and do not attempt to lift a hot basket with bare hands.
Where to go next
Visit Brewing Methods to place percolator brewing within the wider family of coffee-making techniques. Read Clever Dripper and Hario Switch for an alternative brewing approach, then Which Brewing Method Is Best? to choose according to the cup and routine you want.
Sources
-
COLETTI, “Percolator Support: Brewing Guides and FAQs”, undated. Manufacturer guidance on assembly, coarse grinding, circulation and brewing duration.
https://coletticoffee.com/pages/percolator-support -
COLETTI, “3 Mistakes to Avoid When Brewing with a Coffee Percolator”, undated. Manufacturer guidance on gentle perking and alternative timing suggestions.
https://coletticoffee.com/pages/camping-coffee-tips -
National Presto Industries, “12-cup Stainless Steel Coffee Maker: Instructions”, 2026, Form 49-218V. Manufacturer instructions, not independent performance testing.
https://www.gopresto.com/uploads/02811_49_218V_Eng_Web_Instructions_CL.pdf -
Farberware, “Stainless Steel Percolators: Use and Care Book”, models FCP240, FCP280 and FCP412, undated. Manufacturer operating and cleaning instructions.
https://www.useandcaremanuals.com/pdf/FCP240_FCP280_FCP412_12157-01_LR.PDF -
Specialty Coffee Association, “Certified Home Brewer Program: Minimum Certification Requirements”, 2017 programme document. Historical filter-brewer benchmark, not a percolator-specific recipe or a claim about current certification requirements.
https://sca.coffee/research/coffee-standards -
Specialty Coffee Association, “Coffee Standards”, undated archived compilation, section 4.1, “Water for Brewing Standards”.
-
University of California, Davis researchers, Batali, Ristenpart and Guinard, “Brew temperature, at fixed brew strength and extraction, has little impact on the sensory profile of drip brew coffee”, Scientific Reports, 2020. Controlled brewing and sensory study; indexed abstract consulted.
https://pubmed.ncbi.nlm.nih.gov/33020560/ -
University of California, Davis researchers, Batali and colleagues, “The effect of post-brew holding time and carafe type on the sensory properties of drip brew coffee”, Journal of the Science of Food and Agriculture, 2023. Controlled holding and sensory study; indexed abstract consulted.
https://pubmed.ncbi.nlm.nih.gov/36524730/
Researched by comparing retrieved manufacturer instructions with published SCA guidance and peer-reviewed study abstracts; the suggested trial recipe is an editorial adaptation, not a first-hand test.
Last checked: November 2026