Clean a coffee grinder by emptying it, unplugging it and brushing coffee residue from the accessible burrs, grinding chamber and outlet, following the model’s manual. Keep the burrs dry unless the manufacturer explicitly permits washing, and use grinder-cleaning tablets only where both the grinder and cleaner instructions allow them.
In short
- Brush the burrs and the exit chute: cleaning only the bean hopper leaves much of the residue behind.
- Keep water out of the grinding chamber. Wash removable containers only where the manual permits, then dry them completely.
- Use purpose-made grinder cleaner, not rice, descaling solution or espresso-machine cleaning tablets.
- Photograph the grind setting and removable parts before disassembly.
- After reassembly, check the fit of the burr carrier before adjusting the grind or attempting recalibration.
Why oils and fines matter
Burrs are the shaped cutting surfaces that break roasted beans into grounds. Alongside the particles you want, grinding produces fines, the smallest, dust-like particles. Some fines are normal: their presence alone does not mean the grinder is dirty or its burrs are worn.
The maintenance problem is accumulation. Coffee oils and small particles collect around the burrs, inside the grinding chamber and along the outlet. Baratza identifies changes in flavour, grinding speed and consistency, together with blockages, as reasons to keep these areas clean.
Brushing removes loose material; a compatible grinder cleaner can help absorb residual oils. Neither should be treated as a repair for damaged components.
Think of the job as restoring a clean, unobstructed coffee path, not polishing every hidden surface. For the wider maintenance routine, see equipment care and repairs.
Check what your grinder allows
Find the instructions for the exact model before removing parts. A removable upper burr is common, but not universal: Baratza’s Sette series, for example, uses a removable lower burr assembly.
A separate countertop grinder, a hand grinder and an enclosed bean-to-cup grinder need different approaches. On an office bean-to-cup machine, use only the access points and procedures identified as user maintenance. Do not open the casing merely because a standalone grinder tutorial shows exposed burrs.
Gather:
- The manufacturer’s cleaning brush, or a suitable nylon-bristled brush.
- A dry, lint-free cloth and a tray for removable parts.
- A scale if using cleaning tablets.
- The model’s manual, including its reassembly diagram.
- A vacuum with a narrow attachment only if the manufacturer permits it.
Keep grinder cleaning separate from espresso machine backflushing. The products are not interchangeable. Likewise, a clean grinder does not replace the separate routine for bean-to-cup milk systems.
How to clean a coffee grinder step by step
Allow around 15 minutes as a planning allowance, excluding any drying time or subsequent brew adjustments. This is not a requirement to dismantle a grinder every time you clean it.
For the dry burr-cleaning stage, use 0 ml of water. There is no hot-water cycle or target temperature in degrees Celsius: this is brushing, not brewing or descaling.
1. Record the starting position
Photograph the external grind setting and any user-adjustable burr position you intend to disturb. Note your usual coffee dose in grams and, for a timed grinder, its current dispensing time.
This gives you a useful reference, rather than a promise that the same number will produce an identical result afterwards. Keep photographs of parts in removal order beside the manual.
2. Empty the beans, then isolate the power
Follow the manual’s emptying sequence. Where instructed, remove the beans and run the remaining coffee through while the grinder is still fully assembled.
Then switch off and unplug before opening the grinding chamber. Do not try to run a blocked grinder empty repeatedly. If it makes an abnormal noise or coffee stops emerging, stop and consult its blockage instructions.
3. Remove only the authorised parts
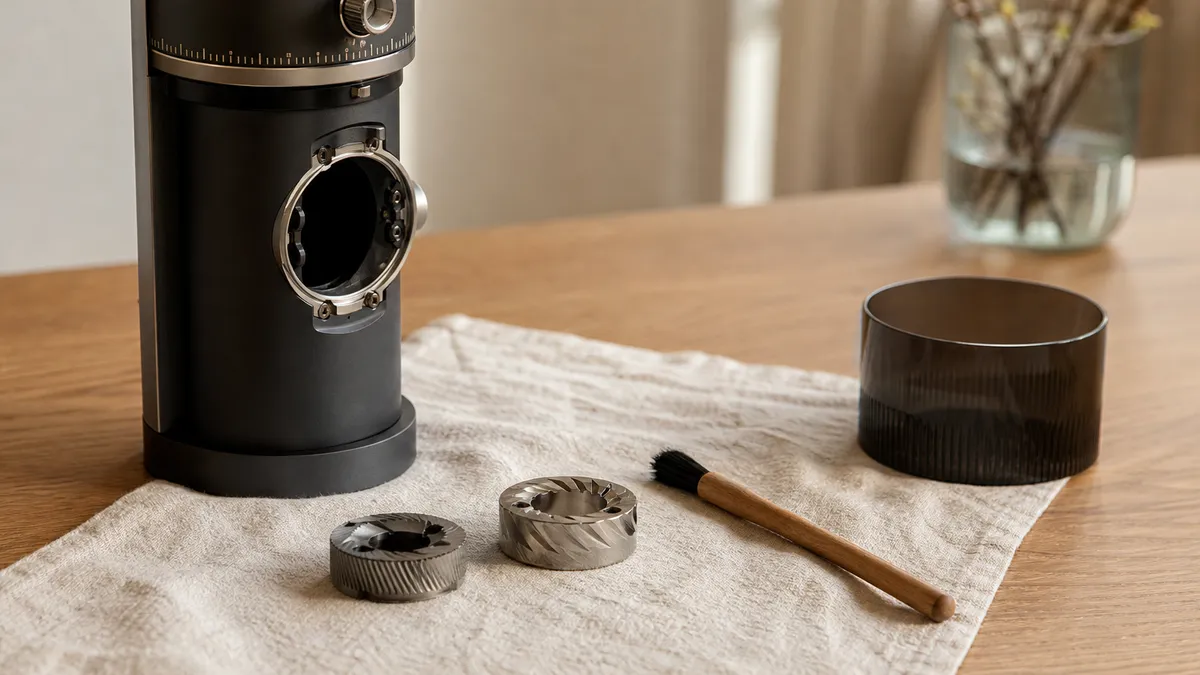
Take off the hopper and removable burr assembly as directed. Place parts on the tray rather than beside the sink, and handle burr edges carefully.
Routine access and advanced disassembly are different jobs. Sage’s Barista Pro guide, for example, separates ordinary upper-burr brushing from a deeper procedure intended for a blockage between the burrs and outlet. Do not copy that deeper procedure onto another model.
If removal requires tools, check the specified direction of rotation. Some grinder fasteners use reverse threads.
4. Brush the burrs and grinding chamber
Brush the removable burr over the tray, working coffee out of its grooves. Clean the accessible stationary burr and surrounding chamber without reaching into areas the manual does not identify for cleaning.
Use controlled strokes rather than scraping with a screwdriver or wire brush. The aim is to lift deposits without damaging surfaces or disturbing fitted components.
Inspect the burr carrier’s seating area before moving on. Leave it clear of loose grounds so you can check reassembly properly.
5. Clear the outlet
Brush the accessible exit chute, where grounds leave the grinding chamber. Do not assume that clean-looking burrs mean the whole coffee path is clear.
Where expressly permitted, use a vacuum to collect loosened grounds. Avoid a general-purpose compressed-air blast into an electric grinder: Mahlkönig favours suction because air can drive particles further into mechanisms.
If a compacted blockage will not release with the approved method, stop. More force is not a substitute for the model’s service instructions.
6. Clean the hopper and grounds container
Wash removable containers only if the manual allows it. Baratza’s Encore ESP instructions permit warm, soapy water for specified removable parts, but prohibit washing the burrs and putting the hopper or grounds bin in a dishwasher.
Rinse permitted washable parts and allow them to dry completely before refitting. Do not use a fixed drying time as proof that moisture has gone.
Wipe the exterior according to the manual, keeping moisture away from the grinding chamber and electrical parts.
7. Reassemble before testing
Refit every removed component in the specified order and orientation. Check that the burr carrier is fully seated, seals are correctly positioned and the hopper locks normally.
If a part will not sit or lock, take it back out and compare it with the diagram. Do not tighten harder or defeat a safety interlock.
Reconnect power only after the grinder is properly assembled.
Using grinder-cleaning tablets
Grinder-cleaning tablets are purpose-made material ground through a compatible grinder to remove coffee residue and absorb oils. They are not the detergent tablets used in a coffee machine’s brewing circuit.
As a specific example, Urnex’s current Grindz instructions specify:
- Empty the coffee from the grinder.
- Add 35 to 40 g for an espresso grinder, or 70 to 80 g for a shop grinder.
- Select a medium setting and grind the cleaner through.
- Repeat the process using coffee beans instead of cleaner to purge the residue.
These are Grindz product instructions, not universal doses or settings. Check your grinder’s approval and the instructions on the actual cleaner you have. Discard the cleaning discharge and purge coffee rather than brewing them.
Standard Grindz is not intended for superautomatic, or bean-to-cup, machine grinders. Urnex explains that it can expand when exposed to water in the brewing chamber. Its separate SuperGrindz formulation is intended for that application, but the machine manufacturer’s approval still comes first.
Do not substitute rice. Baratza warns that rice fragments can strain or jam the mechanism and leave their own residue.
How often should you clean it?
There is no single schedule for every grinder. Follow the model’s instructions, then respond to visible deposits, oily beans and changes in operation.
The manufacturers’ guidance illustrates the variation:
| Grinder or use | Published guidance | How to apply it |
|---|---|---|
| Baratza Encore ESP | Brush burrs about monthly with daily use | Inspect sooner if oily residue or a blockage develops |
| Comandante Nitro Blade | Weekly for heavy use; monthly for light use | Use its brushing and disassembly instructions |
| Commercial Mahlkönig equipment | Daily surface tasks, with deeper and cleaner routines according to use | Follow the exact model’s maintenance schedule |
These are examples, not a schedule to transfer between brands. A domestic grinder’s monthly routine should not automatically become the maintenance plan for a heavily used workplace grinder.
As a practical housekeeping habit, check accessible containers and outlets when finishing use. Empty the grounds container before coffee reaches its maximum fill level. In a shared workplace, assign responsibility and record completed maintenance rather than relying on whoever notices the mess.
Reassembly, recalibration and checking accuracy
Reassembly, dialling in and recalibration are different tasks.
Reassembly restores the original parts correctly. Dialling in means adjusting the normal grind control to suit the coffee and brewing method. Recalibration changes the adjustment reference or operating range using a manufacturer-defined procedure.
Start with reassembly. On the Encore ESP, the ring burr’s tabs must align with their corresponding slots and the carrier must be pressed into place. On a Comandante C40, the manufacturer specifically says not to undo the outer burr’s factory-set mounting screws.
After cleaning, use your recorded setting as a starting point. Compare the next brew using the same beans, dose and brewing method before changing several variables at once. For timed dispensing, weigh the output again rather than assuming the old duration still delivers your intended dose.
If the result has changed dramatically, inspect assembly before attempting calibration. Do not add shims, alter internal adjustment mechanisms or force the burrs together to find a supposed universal “zero”. Use the exact calibration procedure for the model, or ask the manufacturer for help.
Cleaning a coffee grinder should end with a correctly assembled, predictable grinder, not an improvised new calibration.
Troubleshooting after cleaning
Treat these as checks, not definite diagnoses. Broader symptoms belong in coffee machine troubleshooting.
| Symptom | Likely cause or first check | Fix |
|---|---|---|
| Motor runs but little or no coffee emerges | Beans absent, blocked chamber or obstructed chute | Stop, unplug and follow the model’s blockage procedure |
| Grinder will not start after reassembly | Hopper or another interlocked component may not be seated | Check installation; never bypass the interlock |
| Grind is unexpectedly different | Burr assembly or adjustment position may have changed | Check seating, then dial in using the normal control |
| New loud noise | Blockage, foreign object or assembly problem | Stop immediately and inspect only as the manual permits |
| Timed dose is no longer correct | Dispensing duration needs checking | Weigh the output and readjust the normal dosing control |
FAQ
Can I clean a hand grinder in the same way?
Dry brushing is a useful starting point, but follow its own disassembly instructions. Hand grinders can contain washers, springs and bearings whose orientation matters. Water permissions also vary: Comandante allows rinsing for its X25 Trailmaster under stated conditions, while specifically warning that its Ironheart carbon-steel burrs must stay dry. Do not generalise from one model.
Do I need tablets every time I brush the burrs?
No, brushing and tablet cleaning do different jobs, and the required routine depends on the grinder. Brushing removes accessible particles; compatible tablets help with oily residue. Baratza presents tablets as an optional part of routine cleaning, particularly relevant when using dark-roasted coffee. Follow the manufacturer’s schedule rather than adding a tablet cycle automatically.
Will cleaning remove all the fines from my coffee?
No, fines are a normal product of grinding roasted beans. Cleaning removes accumulated residue from the grinder; it does not make every freshly ground particle the same size. If the grounds suddenly look very different after maintenance, check that the grinder is correctly assembled and adjusted before concluding that the burrs need replacing.
Where to go next
Use Coffee Equipment Care and Repairs to build the wider maintenance routine, and Coffee Machine Troubleshooting when cleaning has not resolved the symptom. Espresso Machine Backflushing explains the separate brewing-circuit process, while Cleaning Bean-to-Cup Milk Systems covers the milk path that grinder cleaning leaves untouched.
Sources
-
Baratza, Grinder Cleaning Essentials: Routine Care & How to Prevent Clogs, undated current web guidance. Routine intervals, oil accumulation and cleaning access.
https://www.baratza.com/en-us/blog/cleaning/grinder-cleaning-essentials -
Baratza, Encore ESP Operations Manual, January 2023, version 1.0. Safety, washable parts, reassembly, dosing controls and maintenance.
https://assets.breville.com/ZCG495/manual-encoreesp-v1-0-en-010923.pdf -
Sage Appliances, The Barista Pro BES878/SES878 Quick Guide, November 2019 file revision. Routine brushing, advanced blockage cleaning and troubleshooting.
https://assets.sageappliances.com/BES878/SES878_UG5_WEB_EU_2019_Nov.pdf -
Urnex, Grindz Grinder Cleaning Tablets, undated current product instructions. Product-specific quantities, setting and purge procedure.
https://urnex.com/grindz-grinder-cleaning-tablets -
Urnex, FAQs, undated current web guidance. Standard Grindz restrictions and the distinction from SuperGrindz.
https://urnex.com/faqs -
Comandante, FAQ, undated current web guidance. Hand-grinder cleaning, frequency, disassembly, factory alignment and fines.
https://comandantegrinder.com/pages/faq -
Mahlkönig USA, Ultimate Guide to Cleaning Your Commercial Coffee Grinder, 26 September 2025. Tools, suction, maintenance tasks and a 15-minute deeper-cleaning allowance.
https://www.mahlkoenig.us/blogs/news/clean-commercial-coffee-grinders -
Baratza, Common Grinding Myths, undated current web guidance. Rice, clogging and post-cleaning checks.
https://www.baratza.com/en-au/blog/product-guides/common-grinding-myths
This article was researched from retrieved manufacturer manuals and cleaning-product instructions, distinguishing model-specific requirements from general practical advice; no first-hand testing is claimed.
Last checked: November 2026