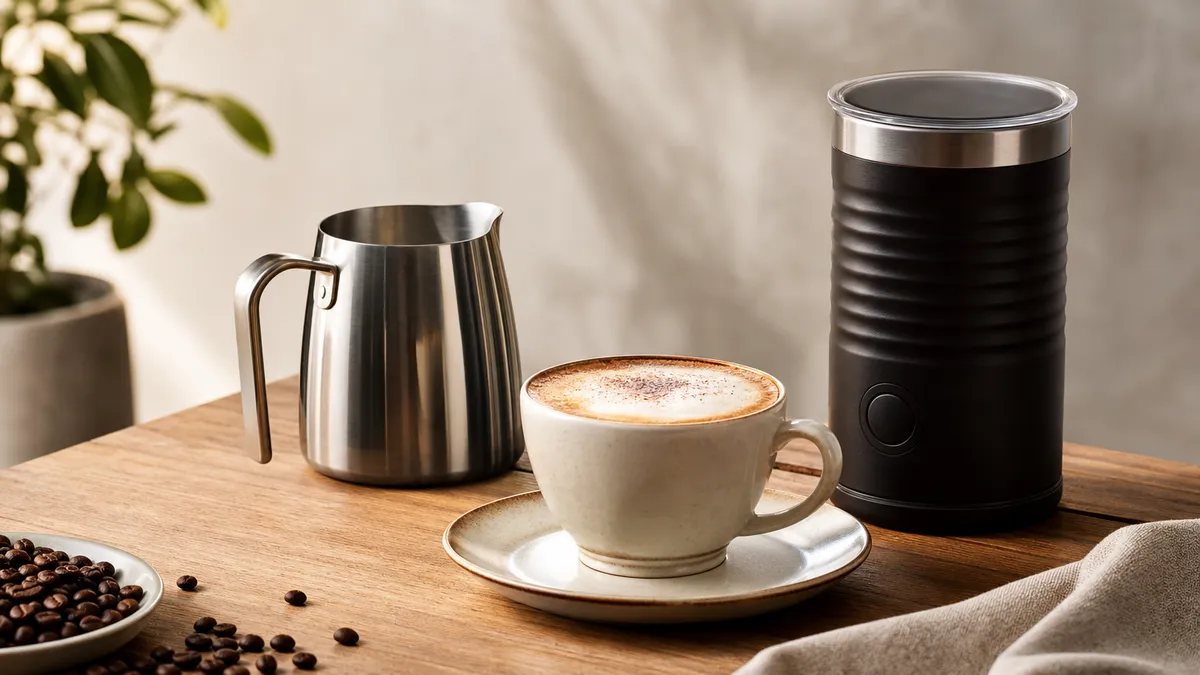
Choose a steam wand and milk pitcher if you want control over silky, pourable milk; choose an electric jug frother if you want heating and frothing with less hands-on work. A handheld whisk suits occasional foam without another countertop appliance, but it does not heat the milk. The right pitcher is the one that fits your usual milk quantity and your machine, not simply the largest jug available.
In short
- Compare frothers by milk texture, heating, usable capacity and cleaning, rather than the number of programmes.
- A steam pitcher needs room for expansion: roughly half-full is a useful starting point unless your machine specifies otherwise.
- Electric frothers can have different limits for heating and frothing. Nespresso specifies 120 ml for foam and 240 ml for hot milk in the Aeroccino 4.
- Start with a straightforward spout and comfortable handle. A sharper spout cannot compensate for poorly textured milk.
- Test plant milk in your own equipment. Formulation and temperature affect both how much foam forms and how long it lasts.
Which milk frother suits your coffee?
First decide what you want in the cup. A spoonable cap of foam and milk that pours smoothly through espresso are different results, even though both are described as “frothed”.
Microfoam means milk containing very small bubbles, mixed into a smooth, flowing texture rather than sitting as a separate, stiff layer. A manual steam wand lets you control air introduction and circulation; an electric jug follows its programmed combination of agitation and heating.
The comparison below uses four criteria: how the tool works, texture control, heating and everyday handling. These are category-level buying judgements, not results from comparative product testing.
| Tool | How it works | Best suited to | Main limitation |
|---|---|---|---|
| Manual steam wand with pitcher | Steam heats milk while positioning controls aeration and circulation | Learning milk texture and free-pour latte art | Requires practice and immediate wand cleaning |
| Automatic steam wand with compatible jug | Machine controls temperature and aeration | Repeatable milk with less manual adjustment | Jug compatibility and placement can be prescribed |
| Electric jug frother | A powered whisk agitates milk, with heating on hot programmes | Convenient hot milk, foam and, where provided, cold foam | Programme labels do not fully describe the resulting texture |
| Handheld whisk | A small rotating whisk introduces air | Occasional foam and minimal countertop equipment | Does not heat milk; requires a separate vessel |
Our recommendation: if you already have a suitable steam wand, start with a well-matched pitcher rather than another frothing appliance. Without a wand, an electric jug is the more straightforward choice when heating and convenience matter most.
Keep the rest of the setup proportionate. The brewing accessories guide helps separate useful tools from purchases that do not serve your usual drinks.
Steam wands versus electric frothers
Steam gives you direct control
With a manual wand, you introduce air near the milk’s surface, then maintain circulation to distribute it. That gives you a way to adjust both foam quantity and how smoothly it mixes with the liquid.
The trade-off is coordination. Wand position, milk quantity and the machine’s steam delivery all matter. Follow your machine’s instructions, particularly for purging, jug placement and stopping the steam safely.
Automatic steaming is a separate option from an electric whisking jug. Check compatibility before replacing its pitcher: Sage’s Bambino Plus guide, for example, instructs owners to use the supplied stainless-steel jug.
Electric frothers favour a simpler routine
An electric jug combines milk preparation in one appliance. Look for the functions you will actually use, such as hot milk without much foam, denser hot foam or cold foam.
Read the manual before judging capacity. Nespresso’s published Aeroccino 4 specification allows 120 ml for frothing but 240 ml for heating milk. Those are starting-liquid limits, not interchangeable serving sizes.
Check the minimum fill too. Ask whether your normal drink fits between the permitted limits, whether repeated preparations need a cooling interval, and which parts can be removed for washing. These details are more useful than a photograph of an exceptionally full cappuccino.
For latte art, seek a demonstration of the actual programme and milk you intend to use. A setting called “latte” is not, by itself, evidence of fine, integrated microfoam.
When a handheld whisk is enough
A handheld whisk makes sense when you want occasional foam and do not need the appliance to manage temperature. It can work with cold milk or milk heated separately, subject to its instructions.
As a specific example, Bodum’s Schiuma instructions recommend whisking for 25 to 30 seconds, or until the milk volume doubles. That describes an airy result, not a universal target for every drink or whisk.
Use a vessel with generous headroom. Immerse the whisk before switching on, and switch it off before lifting it out to reduce splashing. If you heat milk separately, use a suitable heating vessel: a stainless-steel steaming pitcher must not go into a microwave.
Before buying, inspect the practical details:
- Can you reach and clean the whisk head easily?
- Does the shaft detach, and are replacement parts available?
- Is the handle comfortable while the vessel remains on the worktop?
- Does the manual explain cleaning without immersing the motor housing?
Choose a handheld tool for the routine it simplifies, not because its foam is assumed to match a steam wand.
Choosing milk pitcher sizes and spouts
Match the pitcher to the starting milk quantity
A pitcher’s stated capacity is not its recommended steaming fill. La Marzocco’s GS3 manual gives roughly half-full as a useful rule and warns that too little milk in a large pitcher can be blown out.
For an illustrative half-fill calculation:
- A 360 ml pitcher would start with about 180 ml of milk.
- A 600 ml pitcher would start with about 300 ml of milk.
These are calculated starting points, not guaranteed working capacities. Rhino publishes pitchers in both sizes, but your machine’s fill markings and jug requirements take priority.
Think in milk quantities rather than “one cup” or “two cups”. Drinks and cups vary, so establish how much milk you actually need before choosing the jug. Our guide to cups and glassware covers the serving vessel separately.
Check physical fit as well: can the wand reach a useful position without the handle colliding with the machine? With automatic steaming, confirm that the replacement jug is explicitly compatible.
Choose the spout for your pouring goals
A rounded spout is a sensible starting recommendation for general pouring. Sharper designs are worth considering when you already have consistent milk and want to experiment with finer lines.
WPM describes its round spout as producing a faster pour with softer shapes, and its sharp spout as intended for finer, more defined lines. Those are manufacturer design claims, not proof that either shape will improve every user’s results.
Look beyond the tip. Check that the spout is symmetrical, the handle feels secure and the rim is comfortable to pour from. Plain stainless steel is a straightforward starting choice; decorative finishes add another care instruction to check.
The pitcher serves a different job from espresso preparation tools. Keep those decisions separate, as explained in tampers and distribution tools.
Getting useful results from your chosen tool
Use the manufacturer’s method first, then change one variable at a time. For manual steaming, this short sequence provides a framework rather than a replacement for the machine manual.
- Measure your milk. Start with fresh, cold milk and the permitted fill. The 180 ml example above only applies where the pitcher and machine allow it.
- Purge as instructed. Direct discharged steam and water safely into the drip tray.
- Introduce air. Position the tip near the surface and adjust the jug gently.
- Maintain circulation. Once you have enough expansion, move the tip beneath the surface while keeping the milk moving.
- Stop at the appropriate temperature. Sage gives 60 to 65°C for manual texturing in its Bambino guides. Use a suitable thermometer rather than treating touch as a precise measurement.
- Finish safely. Stop steam before removing the wand, then wipe and purge according to the manual.
Do not chase a universal steaming time. Milk quantity and steam delivery differ; temperature and texture are the more useful endpoints.
| Symptom | Likely cause | What to change |
|---|---|---|
| Electric frother overflows | Heating fill limit used for a foam programme | Use the programme-specific maximum |
| Large, conspicuous bubbles during steaming | Excessive air introduction | Reduce surface aeration and establish circulation |
| Milk splashes from a steam pitcher | Too little milk for the pitcher or unsuitable positioning | Use a matched pitcher and permitted fill |
| Little or inconsistent electric foam | Residue, incorrect whisk fitting or unsuitable milk | Clean, refit the whisk and test the milk recommended in the manual |
| Foam changes when switching plant drinks | Different formulation or temperature response | Keep equipment and quantity constant while testing the new drink |
Plant milk: buy for the formulation, then test
There is no reliable rule that every oat drink froths better than every soya or almond drink. Foam performance depends on the complete formulation and how it is processed, not just the plant named on the carton.
Milk foam needs material that can form and maintain films around air bubbles. In plant drinks, proteins, emulsifiers, oils and thickeners can all affect the result. Producing a large volume of foam and keeping that foam stable are also different properties.
A controlled laboratory study published in Soft Matter in 2024 compared dairy milk with several commercial plant drinks. Oat produced the longest-lasting foam among the samples tested, but the findings do not establish a ranking for every brand or recipe.
A barista-labelled drink is a reasonable first trial, not a guarantee. Oatly, for example, describes its UK Barista Edition as micro-foamable and says its acidity regulator supports performance in coffee. That is the manufacturer’s formulation claim.
For a useful home comparison, keep the starting quantity, appliance and programme unchanged. Assess pourability and flavour as well as foam height, and follow any product-specific heating advice rather than assuming the dairy temperature suits every alternative.
Cleaning and the final buying checks
Choose equipment you are willing to clean after every use. A convenient programme loses its appeal if the whisk, seal or lid is awkward to wash.
Steam wands: wipe with a clean, damp cloth and purge as directed immediately after steaming. If performance deteriorates, follow the approved tip-cleaning procedure rather than improvising with sharp tools.
Pitchers: wash away milk residue, rinse and dry. Check dishwasher compatibility for the particular jug and finish.
Electric frothers: remove and wash the permitted components. “Dishwasher-safe” does not include every part: the Aeroccino 4 manual excludes the electrical base and specifies a maximum washing temperature of 70°C for dishwasher-resistant components. Keep connectors dry before reassembly.
Handheld whisks: clean the shaft and head as instructed without immersing the motor housing. Bodum specifically excludes dishwasher cleaning for the Schiuma.
Before choosing milk frothers and milk pitchers, read the cleaning section of the manual as closely as the feature list. Then confirm usable capacity, compatibility and replacement-part support. Those checks connect the purchase to the drink you make every day.
FAQ
Can I froth milk without an espresso machine?
Yes, an electric jug frother or handheld whisk works independently of an espresso machine. An electric jug can heat milk on its hot programmes, while a handheld whisk needs a separate heating method if you want warm milk. Choose according to the milk texture and preparation routine you want.
Should I automatically replace the pitcher supplied with my machine?
No, first learn whether the supplied pitcher suits your normal milk quantity and pouring needs. It may also be required for automatic steaming: Sage specifies the supplied stainless-steel jug for the Bambino Plus. Consider a replacement only after checking compatibility and identifying a particular limitation you want to address.
Are the measurement marks inside a milk pitcher exact?
Not necessarily; treat them according to the manufacturer’s stated accuracy. Rhino says its etched measurement lines may vary slightly from actual measurements and are intended as a guide. They can help you repeat a fill, but should not automatically be treated as precision measuring marks.
Where to go next
Read Brewing Accessories through the accessory overview to plan a coherent setup rather than buying tools individually. Gooseneck Kettles, our pouring kettle guide, covers controlled water delivery rather than milk preparation. If your steam machine’s water requirements need attention, Water Filters for Coffee Machines explains coffee machine filtration.
Sources
- Sage, The Bambino Quick Guide, BES450/SES450, revision G21, undated. Manual steaming, temperature, cleaning and safety instructions. Manufacturer PDF.
- Sage, The Bambino Plus Quick Guide, BES500/SES500, revision H22, undated. Automatic steaming, supplied-jug requirement and wand care. Manufacturer PDF.
- Nespresso, Aeroccino 4 User Manual, model 4194, document dated February 2024. Programmes, fill limits, troubleshooting and cleaning restrictions. Manufacturer PDF.
- Bodum, Schiuma Milk Frother Instructions, model 3040, 2019. Handheld operation, suggested whisking duration and cleaning. Manufacturer instructions.
- Rhino Coffee Gear, Milk Pitcher Range and Rhino Pro Milk Pitcher: 600 ml, undated. Published capacities, construction and measurement-mark caveat. Range PDF and manufacturer product specification.
- WPM, Collections, undated. Manufacturer descriptions of round and sharp spout designs. Manufacturer collections page.
- La Marzocco, GS3 Operating Manual, version 1.3, September 2016. Steam heating, half-fill guidance, pitcher matching and purging. Manufacturer PDF.
- Hassan and colleagues, The bubbly life and death of animal and plant milk foams, Soft Matter, 2024, volume 20, pages 8215 to 8229. Controlled experimental comparison of foam formation and stability. PubMed record and abstract.
- Oatly, Oat Drink Barista Edition, UK product page, undated. Manufacturer claims about microfoam and the role of its acidity regulator. UK product information.
This guide was researched using manufacturer manuals and published specifications, with plant-milk comparisons checked against a primary experimental study; no first-hand product testing is claimed.
Last checked: November 2026