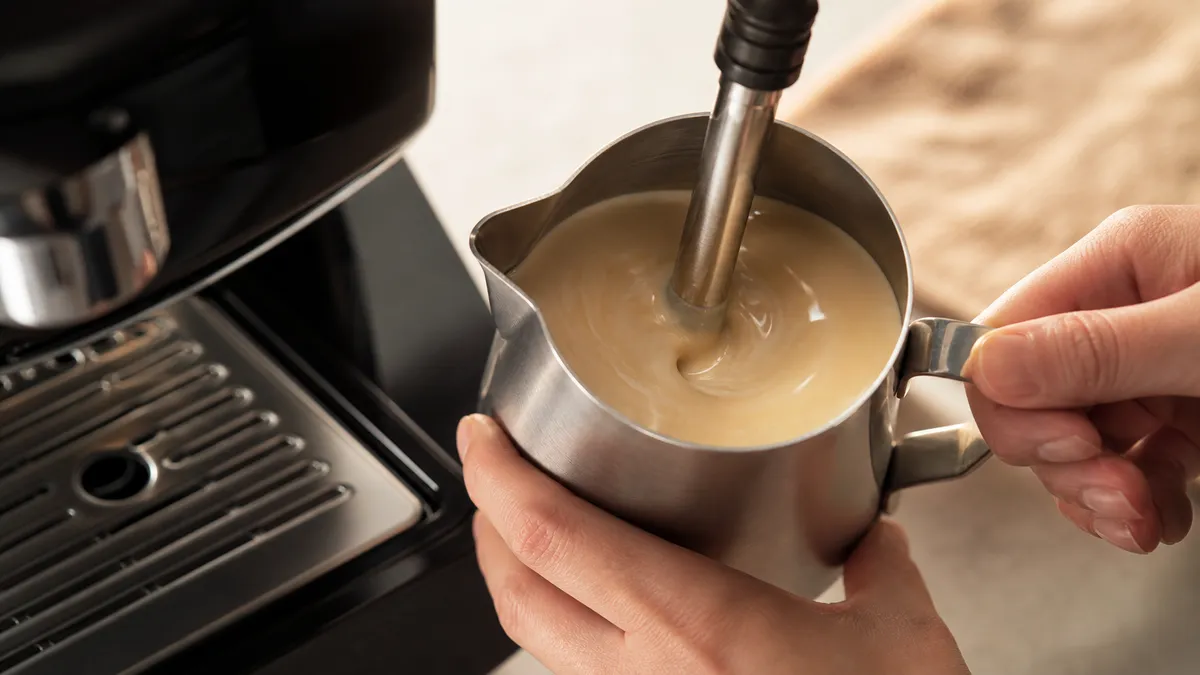
To steam milk and make microfoam, introduce a little air near the surface, then keep the milk rolling in a whirlpool until it becomes glossy and finely textured. For dairy milk, 60 to 65°C is a useful starting target, measured with a thermometer; plant-based drinks need product-specific guidance.
In short
- Start with fresh, fridge-cold milk and a clean stainless-steel jug filled roughly halfway.
- Stretching adds air; texturing distributes that air through the milk.
- Listen for a gentle, controlled hiss, not loud gulping or screeching.
- Move the jug slightly upwards to submerge the tip once you have enough foam, while maintaining the whirlpool.
- Purge before steaming, then wipe and purge immediately afterwards. Keep hands away from steam and hot metal.
What good microfoam looks like
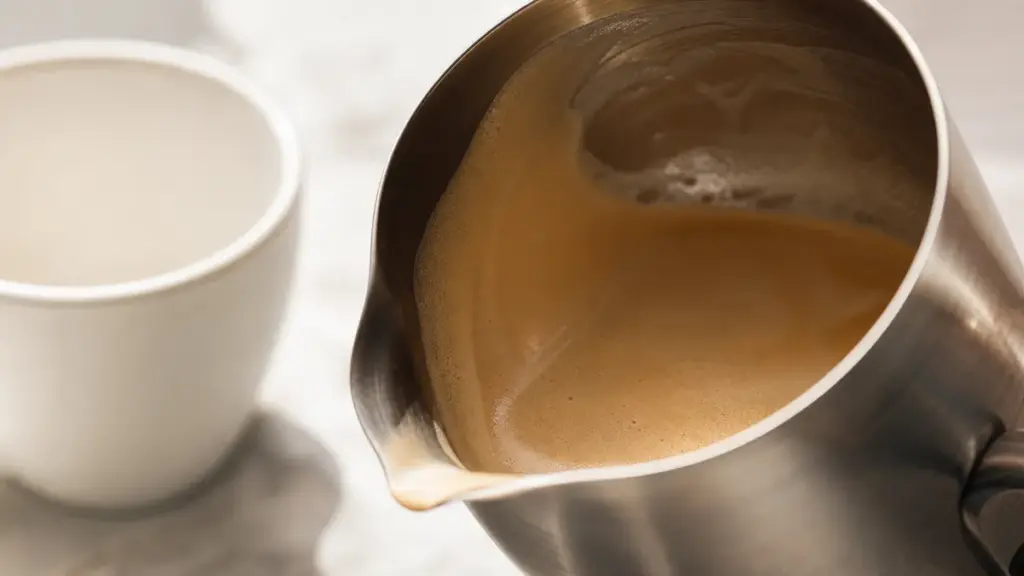
Microfoam is milk containing very fine air bubbles, integrated into the liquid rather than sitting above it as a stiff cap. It should look glossy, flow readily and coat the inside of the jug, rather like wet paint.
The aim is not to make as much foam as possible. For latte art, you need milk that remains fluid enough to pour while carrying an even distribution of small bubbles. A jug full of dry froth may look impressive, but it is a different texture.
This is the practical foundation of coffee art and latte art. Concentrate on repeatable milk texture before attempting a pattern.
Choose your milk, jug and temperature
Milk choice
Fresh whole dairy milk is a sensible starting point for practice. Semi-skimmed and skimmed milk can also foam: fat is not what holds the bubbles together, and more fat does not automatically mean better foam.
Keep the milk choice consistent while learning. Changing the milk, jug and machine settings together makes it difficult to identify which adjustment helped.
Use milk straight from the fridge. UK government food-storage guidance recommends a fridge temperature of 0 to 5°C; follow the carton’s storage instructions and date marking as well.
Jug size and fill level
Choose a stainless-steel steaming jug with a handle and enough empty space for expansion. Roughly halfway full, usually near the bottom of the spout, is a useful starting point, subject to the machine’s instructions.
For a practice batch, try 150 g of cold milk in a jug of approximately 350 ml capacity. This is an editorial starting quantity, not a universal machine requirement or a conversion between grams and millilitres. Adjust it if the wand cannot reach a workable position or the manufacturer specifies a different minimum.
Too little milk can heat very quickly and be difficult to control. Too much leaves insufficient room for expansion.
Temperature: use a thermometer first
For dairy milk, aim initially for a finished jug temperature of 60 to 65°C. Position the thermometer according to its instructions, with its sensing area in the milk rather than against the jug.
Published recommendations differ. La Marzocco’s steaming guide suggests 55 to 60°C for ready-to-drink milk, while Breville’s Bambino instructions give 60 to 65°C. These are practical serving and texturing recommendations, not one universal boundary between successful and failed foam.
Use the thermometer rather than deliberately holding hot metal until it becomes painful. Watch how quickly the reading rises and learn when your particular machine needs switching off.
How to steam milk: step by step
You need a machine with a manual steam wand, a clean jug, cold milk, a milk thermometer and a clean damp cloth reserved for the wand. Read the machine’s steam-control instructions first, particularly if steam continues briefly after switching off.
Safety first: steam, expelled water and the wand can burn. Hold the jug by its handle, use the wand’s insulated grip where provided, and never put a hand beneath the tip.
-
Measure the milk.
Put your practice quantity of 150 g into the approximately 350 ml jug, provided that this gives a suitable fill level for your equipment. Return the carton to the fridge. -
Prepare and purge the wand.
Let the machine reach its steam-ready state. Point the wand into the drip tray, away from people, and briefly release steam to clear condensed water. Stop the steam before positioning the jug. -
Set the starting position.
Put the tip just below the milk’s surface, slightly off-centre rather than directly in the middle. Tilt the jug enough to encourage circulation, keeping the tip away from the metal wall. -
Start steaming and stretch gently.
Activate steam as the manufacturer directs. Lower the jug fractionally until you hear small, controlled hisses as air enters. Breville gives 5 to 10 seconds as an indicative stretching period, but stop according to the amount of foam, not the clock: a powerful wand can require less time. -
Stop adding air and texture.
Raise the jug slightly so the tip sits farther below the surface. Keep the milk circulating in a whirlpool, but stop the repeated air-catching sound. Avoid plunging the wand to the bottom. -
Finish at your temperature target.
Continue rolling the milk towards 60 to 65°C for this dairy practice method. Switch off before removing the wand, and wait until steam flow has stopped completely. -
Wipe and purge immediately.
Set the jug down safely. Wipe milk from the wand and tip with the clean damp cloth, avoiding direct contact with hot metal, then purge into the drip tray according to the manual. -
Polish and pour.
Tap the jug lightly if a few larger bubbles remain, then swirl until the surface is glossy and the texture looks uniform. Pour promptly rather than leaving the milk standing while you prepare everything else.
There is no useful universal total steaming time. Record your own duration alongside milk quantity, starting temperature and final temperature; that gives you a repeatable reference without treating another machine’s speed as a target.
Stretching, texturing and the whirlpool
Stretching: adding the right amount of air
Stretching means introducing air so the milk increases in volume. The tip needs access to the surface, but only in a controlled way.
A soft paper-tearing hiss is a useful cue. Loud gulps and splashes suggest that the tip is catching too much air at once. Make small adjustments rather than repeatedly lifting and dropping the jug.
Texturing: keeping the milk together
Texturing means circulating the milk so the foam and liquid become evenly integrated. Stretching and circulation can overlap; they are not necessarily two completely separate operations.
During the later stage, the milk should continue rolling without repeatedly drawing in fresh air. Watch the whole surface, not just the patch around the wand. A visible whirlpool is useful because it shows that milk is circulating rather than merely bubbling in one spot.
If the surface tumbles unevenly, make a small change to the jug’s angle or the wand’s off-centre position. There is no single correct angle for every steam tip and jug.
Let sound guide small corrections
A controlled hiss during aeration is helpful; persistent harsh screeching can indicate that the tip is too deep. Once you have enough air, the sound should become quieter as you maintain circulation.
Sound is feedback, not a complete diagnosis. If the wand produces unusually weak steam even when correctly positioned, stop and check the machine’s cleaning and troubleshooting instructions.
Steaming plant-based milks
Plant-based drinks do not all respond alike. Start with a product intended for steaming, follow its instructions and keep the brand and formulation consistent during practice.
Use the milk maker’s temperature recommendation where available. For example, Alpro recommends 60°C for its Barista Almond and 65°C for its Barista Soya, Oat and Coconut. Those figures describe its own products, not every drink made from those ingredients.
Generic advice can conflict with product-specific guidance. Breville’s UK Barista Sense manual suggests 55 to 60°C for soya, for example. Different formulations are one reason not to apply a single plant-milk temperature chart universally.
Begin with the same controlled surface aeration and rolling action, then adjust the amount of air from the result. Do not assume that every plant drink needs either more stretching or a lower temperature than dairy.
At a shared office tea point, consider allergens as well as texture. Separate, clearly identified jugs can help manage cross-contact, but a shared wand and cloth still need an effective cleaning procedure. An ordinary wipe and purge should not be treated as a guarantee that equipment is allergen-free.
Troubleshooting milk foam
Change one variable at a time, keeping the milk quantity and jug consistent.
| Symptom | Likely cause | Fix |
|---|---|---|
| Large bubbles and loud gulping | Tip too close to or above the surface | Raise the jug slightly to submerge the tip more |
| Persistent screeching | Tip too deep during the aeration stage | Lower the jug fractionally and re-establish controlled air intake |
| Hot milk with very little foam | Insufficient air introduced | Allow a little more surface aeration early in the next attempt |
| Thick, stiff foam that will not flow | Too much air added | End stretching earlier and spend the remaining time rolling |
| Uneven surface with poorly integrated foam | Inadequate circulation | Adjust the jug angle and off-centre tip position |
| Weak steam despite suitable positioning | Machine not ready, restricted tip or another maintenance issue | Follow the manufacturer’s readiness, cleaning and descaling checks |
Tapping can remove a few visible bubbles, but it cannot substitute for controlled aeration. If repeated tapping still leaves coarse foam, correct the steaming technique on the next batch.
Why milk composition matters
Milk proteins help stabilise the boundary between air bubbles and liquid. Fat affects foaming too, but its effect is more complicated than “more fat makes more foam”.
In a 2024 controlled laboratory study, Ho and colleagues compared milk preparations using steam injection and mechanical mixing. Their results showed that the balance between protein and fat substantially affected foaming behaviour. Adding extra protein ingredients to whole milk at the levels studied did not automatically improve its foaming properties.
That finding helps explain why protein content alone is not a reliable shopping rule for perfect microfoam. It also supports a practical approach: choose a suitable milk, then learn how that particular product responds.
Judge your finished milk before judging the picture it makes. Once you can steam milk into a glossy, flowing texture consistently, move on to pouring latte art.
FAQ
Can I make microfoam without a steam wand?
You can aerate milk without a steam wand, although the method and degree of control differ. Handheld frothers, whisks and other devices introduce air, but this guide’s positioning and sound cues apply specifically to steam-wand use. If you are learning this method, keep the equipment consistent rather than changing between frothing techniques.
Do I need a special latte-art jug?
You need a suitable steaming jug, not an elaborate design. Start with a stainless-steel jug that has a comfortable handle, enough expansion space and a size that suits the milk quantity and wand. Establish consistent steaming first; use the same jug while learning so its shape does not become another changing variable.
Does UHT milk behave exactly like pasteurised milk?
Not necessarily. Controlled research on steam-frothed dairy milk found that processing type and heating temperature affected bubble size, viscosity and foam stability. That does not make either category universally unsuitable. Practise with the product you intend to use, and assess its texture rather than assuming that all dairy milk will steam identically.
Where to go next
Read How to Pour Latte Art for the pouring stage once your microfoam flows consistently, then Heart, Tulip and Rosetta for individual patterns. For the wider creative context, Coffee as an Art Form moves beyond the technique of how to steam milk.
Sources
-
Breville, the Bambino Instruction Book, BES450, retrieved edition with document code M26, undated.
https://assets.breville.com/BES450/BES450_USCM_IB_M26_LR.pdf -
La Marzocco, How to Steam Milk, 2022.
https://www.lamarzocco.com/it/en/how-to-steam-milk/ -
Breville, How to steam milk: A step-by-step guide, undated. Technique sections used; unsupported explanations of sugar melting were not adopted.
https://www.breville.com/en-us/blog/coffee-and-espresso/how-to-steam-milk -
Breville USA, The Barista Express: How to texture milk, manufacturer video and accompanying instructions, 2021.
https://www.youtube.com/watch?v=OtdlZbc9XK0 -
Blue Bottle Coffee, Milk Steaming Guide, undated.
https://cdn.bluebottlecoffee.com/us/eng/brew-guides/milk-and-art -
Breville UK, Newell Brands, Breville Barista Sense User Guide, VCF187, document VCF187_24EM2 (UK), Rev. A, 2024.
https://www.breville.co.uk/on/demandware.static/-/Sites-breville-uk-Library/default/dw1b741d2d/documents/instruction-manuals/6.25%20Update/VCF187_24EM1%20%28UK%29%20SENSE%20%281%29.pdf -
Alpro, Barista, product-specific steaming recommendations, undated.
https://www.alpro.com/egen/collection/barista -
Ho, T. M. and colleagues, Foaming Properties and Foam Structure of Milk Determined by Its Protein Content and Protein to Fat Ratio, Food and Bioprocess Technology, 2024.
https://link.springer.com/article/10.1007/s11947-024-03407-y -
Food Standards Agency, via GOV.UK, How to chill, freeze and defrost food safely, 2017.
https://www.gov.uk/government/publications/how-to-chill-freeze-and-defrost-food-safely/how-to-chill-freeze-and-defrost-food-safely -
Food Standards Agency, via GOV.UK, Precautionary allergen labelling, 2023.
https://www.gov.uk/government/publications/precautionary-allergen-labelling/precautionary-allergen-labelling -
Klimanova, Y. and colleagues, Effect of steam frothing on milk microfoam: Chemical composition, texture, stability and organoleptic properties, International Dairy Journal, 2022.
https://doi.org/10.1016/j.idairyj.2022.105476
This article was researched using manufacturer instructions, milk-producer guidance, controlled milk-foaming research and official food-storage and allergen guidance, without first-hand equipment testing.
Last checked: November 2026