Pour a heart by forming a white circle and drawing a thin stream through it; build a tulip with separate, overlapping pours; make a rosetta with a continuous side-to-side wiggle. All three need flowing microfoam, a low spout when drawing and a lighter, raised finish.
In short
- Learn the heart first, then tulip stacking, then the rosetta’s continuous movement.
- Start with glossy microfoam: tiny bubbles dispersed through milk, not a stiff foam cap.
- Pour higher to mix the base, then bring the spout almost to the surface to draw.
- Stop the flow between tulip layers; keep it running while forming rosetta leaves.
- Before finishing any pattern, reduce the flow and lift the jug, then draw through the centre.
Set up a repeatable practice drink
These patterns belong to free-pour latte art, where the pouring movement makes the design without a drawing tool. The wider coffee art and latte art guide puts them alongside other techniques.
For this exercise, use the following suggested setup. The cup and milk quantities are practice choices, not competition rules or universal requirements:
- A wide, rounded cup holding approximately 200 ml.
- A clean, spouted milk jug of approximately 350 ml, provided its recommended filling level suits the milk quantity.
- Approximately 150 ml of cold milk.
- Espresso scales, a timer and a milk thermometer.
- An espresso machine with a steam wand.
A useful espresso starting recipe is 18 g of ground coffee yielding 36 g of espresso, a 1:2 dose-to-yield ratio, in approximately 25 to 35 seconds. Use a basket intended for your dose and adjust the recipe for flavour rather than chasing the clock.
Choose one milk and keep it constant while learning. Whole dairy milk is a reasonable starting point; if using a plant-based drink, choose one intended for steaming and follow its maker’s instructions.
Prepare the base
- Brew the espresso into the cup using your established recipe. Gently swirl to make the surface colour more even.
- Steam the milk to approximately 60 to 65 degrees Celsius, using a thermometer while learning. Follow the machine’s filling and operating instructions rather than imposing a fixed steaming time.
- Stop the steam before removing the wand, then wipe and purge it as the manufacturer directs.
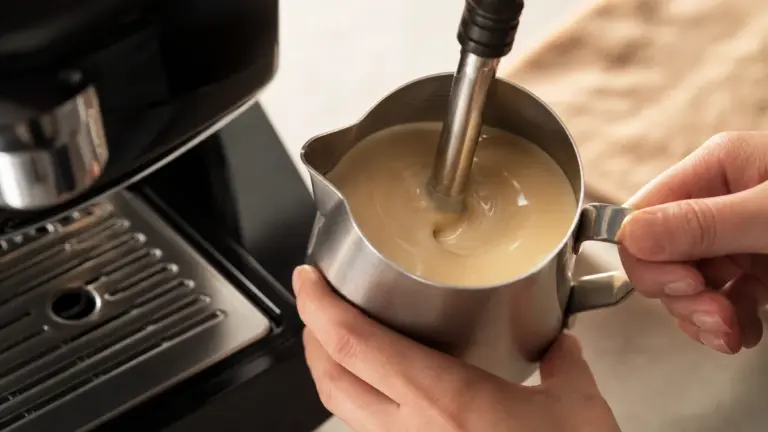
- Swirl the jug until the milk looks glossy and moves as one fluid. Pour promptly rather than leaving it standing while arranging equipment.
The target is pourable milk with very fine bubbles, not hot milk underneath a spoonable mound. If yours separates or lands in clumps, work through steaming milk and making microfoam before adding more complicated movements.
Keep the milk refrigerated and follow its storage instructions and use-by date. FSA guidance for England, Wales and Northern Ireland recommends a fridge temperature between 0 and 5 degrees Celsius.

Understand the movements shared by all three patterns
Think of the pour as three jobs: mix, draw, finish.
During mixing, a narrow stream from above the surface carries milk into the coffee. During drawing, the spout comes almost down to the surface so white foam spreads visibly across it. At the finish, lifting the jug and narrowing the stream lets you draw through the pattern without laying a broad white stripe over it.
Cup tilt helps the spout reach the surface before the cup is full. Straighten the cup progressively as the drink rises, keeping the drawing spout close rather than letting the increasing liquid level change your working distance.
The exact changeover point is not sacred. For this practice method, begin drawing at roughly one-third full, then adjust according to the cup and how much room your pattern needs.
For a fuller explanation of grip, cup position and flow control, use the basic latte art pouring method. Here, concentrate on what changes between the three designs.
How to pour heart latte art
A heart is a white circle shaped by a central finishing stroke. Learn a solid heart before adding decorative ripples: it gives you fewer movements to diagnose.
- Tilt the cup towards the jug. Keep the espresso pooled beneath the pouring position.
- Mix the base. Pour a thin, steady stream into the centre from above the surface until the cup is roughly one-third full.
- Lower the spout. Bring it almost to the liquid without dipping it in. Increase the flow gently until a white patch appears.
- Grow the circle. Keep pouring into the same place rather than drawing the outline of a heart. Straighten the cup as it fills.
- Make the point. Before reaching the brim, reduce the flow, lift the jug and move the thin stream straight through the circle towards the opposite side. Stop cleanly.
Look for: two balanced shoulders, a central indentation and a distinct point, with brown coffee still framing the white.
If you get a white apple or rounded blob, inspect the finish first. Moving across while the spout is still low paints more white onto the surface instead of making a clean cut-through. If the heart is lopsided, check that the circle was centred before changing your finishing movement.
How to stack a tulip
A tulip replaces the heart’s single growing circle with separate deposits of foam. Each new deposit pushes against the earlier one, creating overlapping curved layers.
Start with a simple three-layer exercise. More layers can wait until the gaps remain visible.
- Mix the base as for a heart, leaving plenty of room for the pattern.
- Pour the first small circle. Lower the spout near the centre and let a white patch form. Tip the jug back enough to stop the flow.
- Add the second layer. Restart close to the surface, slightly nearer the jug than the first deposit. Give a small forward push so the new foam nudges the previous layer away.
- Stop again, then add the third layer. Keep this final deposit modest. Do not use all the remaining space making it larger.
- Join the stack. Narrow the stream, lift the jug and draw through the centres of all the layers in one straight movement.
Look for: separate white curves with visible brown gaps, aligned along one centre line.
The essential skill is the stop, not a large shove. If milk keeps dribbling between deposits, the layers can merge before you finish. If they remain isolated dots, try placing the next deposit closer and using a gentler forward push.
Do not pause to admire each layer. Make the stops deliberate but brief, keeping the sequence controlled rather than hesitant.
How to pour a rosetta
A rosetta uses a continuous pour to make alternating leaf-like lines. The jug rocks from side to side while gradually retreating; a final stroke through the middle creates the stem.
- Mix the base, then lower the spout close to the surface around the centre of the cup.
- Establish a small white patch. Avoid beginning the sideways movement before you can see the foam.
- Start a gentle wiggle. Rock the jug evenly from side to side. Think of a small, controlled movement, not shaking your whole arm.
- Retreat towards yourself. Continue pouring and wiggling while drawing the jug back towards the near rim. Straighten the cup as it fills.
- Finish the tip. Reduce the sideways movement as you approach the end of the leaf.
- Draw the stem. Slow the flow, lift the jug and move straight forward through the middle of the leaves. Stop before overflowing.
Look for: balanced leaves on both sides and a narrow central stem.
Speed alone does not produce fine leaves. Work on an even rhythm first. La Marzocco’s training advice specifically warns against frantic shaking, which makes the movement harder to control.
If you get a rippled blob rather than a leaf, check whether the jug actually retreated. If the leaves are recognisable but a thick white stripe covers them, correct the finishing height and flow before changing the wiggle.
Troubleshoot the pattern, not just the milk
These are likely causes, not certain diagnoses. Change one thing on the next pour so you can see whether it helped.
| Symptom | Likely cause | Fix |
|---|---|---|
| Heart remains a round blob | Broad, low finishing pour | Reduce flow and lift before moving through |
| Heart has uneven shoulders | Off-centre circle or finishing stroke | Check alignment before the cut-through |
| Tulip becomes one white mass | Deposits too large or flow not stopped | Make smaller layers with complete stops |
| Tulip looks like separate dots | Layers too far apart or insufficient push | Restart closer and nudge forward gently |
| Rosetta becomes a rippled blob | Wiggling without retreating | Add a slow backward movement |
| Rosetta leaves are irregular | Uneven rocking or excessive shaking | Slow down and keep the movement small |
| Any design disappears beneath the surface | Drawing spout too high, or insufficient foam | Lower the spout first, then assess texture |
| Foam arrives as a thick lump | Excessive aeration or separation | Review steaming and swirl immediately before pouring |
A practice plan that builds control
Use this as an editorial practice routine, not a promised timetable. Spread it across drinks you would otherwise make.
Stage one: circles and hearts
Begin with a centred white circle. Once that feels repeatable, add the raised cut-through.
For each attempt, record whether the white appeared where intended, whether the circle was balanced and whether the finish stayed narrow. Avoid changing cup, milk and espresso recipe at the same time.
Stage two: two layers, then three
Practise two distinct deposits before attempting the full tulip. Watch whether the flow actually stops and whether a brown gap survives.
Add the third layer only when you can place the second reliably. Resist adding layers to disguise an untidy base.
Stage three: wiggle, then retreat
Rehearse the rocking movement with an empty jug, then try it during a pour. Finally combine it with the backward travel that lengthens the rosetta.
Film an occasional attempt from the side as well as above. Use the side view to inspect spout height and the overhead view to assess alignment.
Refine one variable at a time
For finer control, separate height, flow and travel in your notes. “Rosetta failed” is not useful feedback; “leaves formed, but the low finishing pour covered them” gives you a specific next action.
Heart, tulip and rosetta are not merely three pictures to memorise. Treat them as exercises in holding position, stopping and restarting, and coordinating continuous movement.
FAQ
Can I practise without making espresso every time?
Yes, you can rehearse movements with water and practise cup levelling without brewing coffee. Plain water will not reproduce milk foam or espresso crema, so use it for handling rather than judging the finished pattern. Treat these as separate drills, then check what you have learnt in a normal drink.
Can I pour these patterns with oat drink?
Yes, a barista-style oat drink can be used for these patterns. Follow its manufacturer’s steaming guidance rather than assuming it behaves exactly like dairy milk. Keep the same product while learning, begin with a solid heart and assess how clearly its white areas separate from the brown coffee before attempting fine rosetta lines.
Do I need a different jug for every pattern?
No, begin with one suitable spouted jug and learn how it responds. Both the heart and more complicated patterns depend on controlling its position and flow. Keep the jug constant during your first practice sessions; changing equipment after every disappointing pour makes it harder to identify whether your movement has improved.
Where to go next
Read How to Steam Milk and Make Microfoam if texture is still inconsistent, then How to Pour Latte Art to revisit positioning and flow. Latte Art Masterpieces offers inspiration once your heart, tulip and rosetta are repeatable.
Sources
-
Extract Coffee Roasters, Power up your latte art, undated, accessed November 2026. Heart sequence and advice on alternative milks.
https://extractcoffee.co.uk/trade/coffee-training-and-education/online-barista-training/power-up-your-latte-art/ -
La Marzocco Home, Pro Tips for Latte Art, 2019. Drawing height, controlled rocking and the raised finishing stroke.
https://home.lamarzoccousa.com/?p=153321 -
Lavazza, How to Make Latte Art at Home: A Beginner’s Guide, undated, accessed November 2026. Tulip layering, rosetta movement and troubleshooting.
https://www.lavazzausa.com/en/recipes-and-coffee-hacks/latte-art-guide-for-beginners -
Dennis Hew, hosted by Decent Espresso, Everybody Latte Arts, Decent Espresso edition, 2024. Foundation-pattern progression and control of stacking and wiggling.
https://decentespresso.com/doc/everybody_latte_arts/everybody_latte_arts.pdf -
La Marzocco Home Australia, How to Steam Milk Like a Pro Barista, 2025. Microfoam texture, temperature and prompt pouring.
https://au.lamarzoccohome.com/blog/how-to-steam-milk-like-a-pro-barista/ -
La Marzocco Home, Using Espresso Brew Ratios, 2022. Suggested espresso dose, yield and extraction-time starting point.
https://home.lamarzoccousa.com/using-espresso-brew-ratios/ -
Food Standards Agency, published on GOV.UK, How to chill, freeze and defrost food safely, 2017, current page accessed November 2026. Refrigeration and storage guidance for England, Wales and Northern Ireland.
https://www.gov.uk/government/publications/how-to-chill-freeze-and-defrost-food-safely/how-to-chill-freeze-and-defrost-food-safely -
Breville, the Bambino, BES450 Instruction Book, USCM revision M26, 2026. Manual milk texturing and steam-wand handling. Used for technique, not machine comparison.
https://assets.breville.com/BES450/BES450_USCM_IB_M26_LR.pdf
This article was researched from manufacturer and roaster training materials, a specialist latte art manual and official food-storage guidance; the practice setup and progression are editorial suggestions, not first-hand test results.
Last checked: November 2026